
In 2024, How To Fix OEM Unlock Missing on Itel?
How To Fix OEM Unlock Missing on Itel P55T?
Original Equipment Manufacturer (OEM) Unlock is a function on Android devices. It allows you to unlock your phone bootloader. A bootloader or bootstrap loader gathers the operating system files, loads them into memory, and hands over control, essentially starting your device. Unlocking the bootloader assists you in installing custom ROMs, flashing custom kernels, and rooting your phone.
However, this freedom comes with some trade-offs. Most manufacturers will void your warranty if you unlock the bootloader, and it can also make your phone face higher risks of malware and other security threats. Additionally, it can be difficult to relock the bootloader once you unlock it.
If you encounter the OEM unlock missing on your Android phone despite wanting to unlock your bootloader, this article can help. You will learn the step-by-step guide for the different methods to fix the missing OEM unlock option. Before diving into solutions, let’s explore why this option might be unavailable in the first place.


Part 1: Why Is OEM Unlock Missing on Your Device?
Finding that OEM Unlock is missing on your Android phones can be frustrating, particularly if you plan to modify your software or install a custom ROM. But don’t worry. There are several possible explanations for this. Let’s explore some of the most common reasons:
Manufacturer Restrictions
The Missing OEM Unlock option can often be due to restrictions imposed by your device’s manufacturers. They may intentionally remove this option to safeguard device security and compatibility. It is common with carrier-locked devices. As a result, the OEM Unlock option may not show.
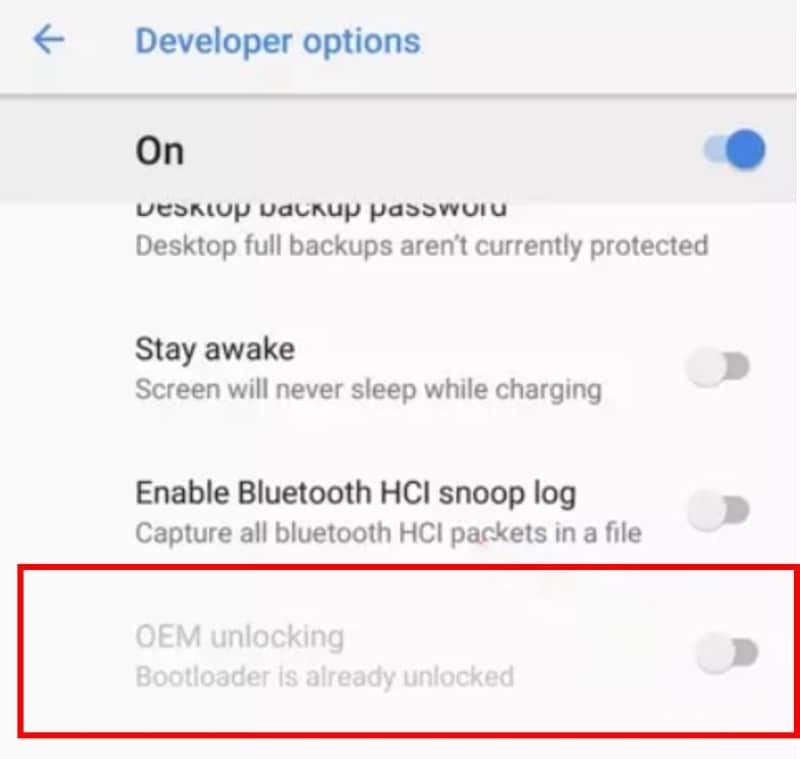
Bootloader Already Unlocked
In some cases, the Android OEM Unlock Missing issue arises when the bootloader has already been unlocked. Relocking the bootloader might make the option reappear. But exercise caution as this process can erase device data.
Developer Options Not Enabled
It might seem obvious, but sometimes the simplest things get overlooked. The OEM Unlock option can only be accessed from within Developer Options. If this menu isn’t enabled, you won’t see it.
Carrier-Locked Devices
The OEM Unlock Missing issue can also occur if your device is carrier-locked. Carriers often impose restrictions to prevent users from switching networks, and bootloader unlocking is one way to do that. Unfortunately, the missing OEM Unlock option is usually intentional, and unlocking your device can be more complicated.
Security Features
Enhanced security features, like Samsung’s KNOX, can sometimes conceal the OEM Unlock option. Temporarily turning off these features might show the option, but it’s crucial to be aware of the potential security implications of doing so.
Corrupted Bootloader
A corrupted bootloader can also lead to the Android OEM Unlock missing problem. The bootloader plays a role in the boot process, and if it’s damaged, it might not display the necessary options. This can be caused by software glitches, failed flashing attempts, or even hardware issues. In this scenario, you might need to consult your device’s manufacturer or a technical specialist to help repair or re-flash the bootloader.
Connectivity Issues
A poor connection between your device and computer can also prevent the OEM Unlocking from showing up. Check your cables and try using different USB ports to ensure a stable connection.
Part 2: How To Enable Missing OEM Unlock Without a Password?
Unlocking your phone’s bootloader (OEM Unlock) varies across models and brands. Some need a passcode or PIN after rebooting the phone, while others don’t. Even if your phone doesn’t require a separate password, your existing screen lock (password, PIN, pattern) will usually be needed to enable the missing OEM unlock option.
But what if you forgot that, too? Wondershare Dr.Fone - Screen Unlock can help bypass forgotten passwords and unlock your phone even if you don’t have the technical knowledge. Here’s a quick breakdown of its key features in this area:
- Success Rate
High success rate for bypassing various lock screen types, including PIN code, pattern lock, passwords, and fingerprints.
- Ease of Use
Provides a concise and intuitive interface that guides users with clear instructions and on-screen prompts.
- Comprehensive Features
Dr.Fone - Screen Unlock tool can remove the Android phone lock screen without resetting your Samsung or LG device. It can also help you bypass Google Factory Reset Protection (FRP) on mainstream Android brands.
- Extensive Device Compatibility
Aside from Samsung and LG, it covers a wide range of popular Android brands like Vivo, Huawei, Xiaomi, Oppo, etc.
Regain control in minutes with Dr.Fone. First, download the app to your desktop and install it. Once it’s up and running, launch Dr.Fone and prepare to unlock your device with ease. You’ll find detailed instructions below – even if you don’t know your phone’s lock screen, Dr.Fone has you covered.
- Step 1: Select Screen Unlock from the Toolbox homepage. Then, establish a connection between your locked Android device and your computer using a USB cable.

- Step 2: Specify the Itel P55T device type for screen lock removal.

- Step 3: Select Unlock Android Screen to proceed.

- Step 4: Choose the brand of your phone from the supported brands.

Note:
The following steps will vary based on your device’s manufacturer. Please refer to the instructions on your screen to proceed into Download or Recovery mode.
- Step 5: The screen unlock process is underway. If it encounters trouble, click Try Again. Once Dr.Fone successfully unlocks your Android device, tap Done.


Now that you’ve regained access to your device thanks to Dr.Fone - Screen Unlock, you can move forward with enabling the OEM unlock missing option. Next up, we’ll guide you through the steps in several ways. Let’s start with the Developer options.

Part 3: How To Enable OEM Unlock Missing From the Developer Options?
Developer Options, a hidden menu in Android, offers advanced features like app debugging and custom ROM installation. But if the Android OEM unlock option is missing, you can’t unlock your device’s bootloader. Below is a step-by-step guide for you so the OEM unlock missing option will show in the Developer Options. Remember, this process may erase your device data, so a complete backup is essential before proceeding.
- Step 1: Open the Settings app on your Android phone.
- Step 2: Navigate to About Phone at the bottom of the list, then tap Software information.

- Step 3: Tap on the Build number repeatedly (7 times) until you see a message saying, “You are now a developer!“ or similar.
- Step 4: Go back to Settings > System and find the Developer options menu.
- Step 5: Scroll down and tap the toggle switch next to Enable OEM Unlock to turn it on.

- Step 6: A warning message explaining the risks of turning on the OEM unlock will appear. Read it carefully and tap Enable if you want to proceed.
- Step 7: Enter your PIN or password to confirm the unlock when prompted
- Step 8: Your device will reboot, and OEM Unlocking will be enabled.

Part 4: How To Fix OEM Unlock Missing by Adjusting Date and Time?
Some manufacturers intentionally delay the availability of the OEM unlock after a software update for security reasons. Changing the date to a past date before the update rolled out can trick the system into displaying the option, as it thinks the update hasn’t happened yet. It is a temporary fix, and the option will likely disappear again later when the Itel P55T device automatically syncs the correct date.
If you intend to try this method, follow these steps to enable OEM unlock missing or greyed out after an Android update:
- Step 1: Open the Settings app.
- Step 2: Go to System or General management, depending on your Android version.
- Step 3: Tap on Date and Time.
- Step 4: Turn off Automatic date and time.

- Step 5: Tap on Set date and choose the desired older date from the calendar.
- Step 6: Tap on Set time and choose the desired time from the clock.
- Step 7: Tap on Done to save the changes.
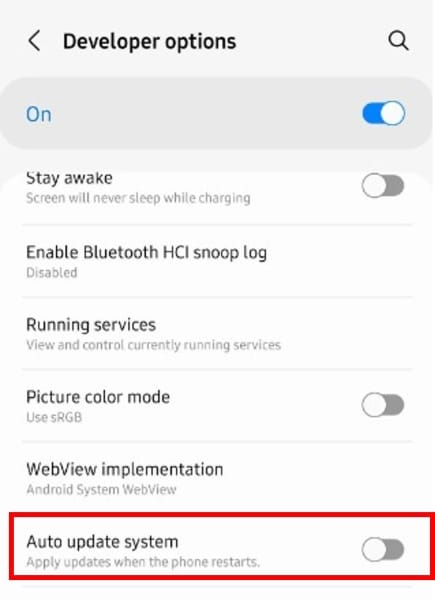
- Step 8: Go back to the Developers options and turn off the Auto update system option.
- Step 9: Go to Settings > Software update, then turn off Auto download over Wi-Fi.

This method should enable the OEM unlock missing issue. Otherwise, proceed to the next section for another solution.
Part 5: How To Fix OEM Unlock Missing by Removing SIM Card?
Certain carriers restrict bootloader unlocking on their devices to ensure compatibility and prevent unauthorized modifications. For these phones, unlocking the SIM card becomes crucial before you can toggle the OEM unlock option. Here are the steps to fix the OEM Unlock missing or greyed out using SIM card removal:
- Step 1: Use the SIM ejector tool (often included with your phone) or a small pin to push the tray out.
- Step 2: Go to Settings > General Management > Reset, then select Factory data reset. Enter your PIN or password if needed.


- Step 3: Review the warning and tap Reset to confirm.
- Step 4: Once the reset is complete, your phone will restart. Connect to Wi-Fi when prompted.
- Step 5: Skip any prompts to log in to your Google or email account. Then, repeat the process to open the Developer Options in the previous sections.
Conclusion
Having the OEM Unlock missing or greyed out can leave Android users feeling locked out of customization possibilities. Fortunately, this article has outlined helpful solutions like enabling the Android OEM Unlock missing option via the Developer Options. You can also try other methods above, like adjusting date and time settings or even a sim card removal trick. For those facing forgotten lock screens, we’ve offered guidance on bypassing them using the Dr.Fone - Screen Unlock tool to access the necessary phone settings.
While these methods provide a solid foundation, it’s always wise to research steps specific to your phone model. And never forget – caution is key. If things get technical, don’t hesitate to seek help from online communities or professional repair services.
Tips: Forget your device password and can’t get access to it? No worries as Dr.Fone is here to help you. Download it and start a seamless unlock experience!
How To Remove or Bypass Knox Enrollment Service On Itel P55T
In today’s digitally-driven work environment, many companies rely on Knox Enrollment Service to secure their employees’ phones and safeguard sensitive data. However, you might have a Knox-enrolled phone you wish to unlock for personal use.
This article will guide you through removing or bypassing the serviceon your phone. However, it’s important to note that this should ideally be done with your employer’s consent. For transitioning to personal use or other reasons, understanding how to remove or bypass Knox Enrollment Service can be crucial for some users.
Part 1: What Is the Knox Enrollment Service?
Knox Enrollment Service is an integral part of Samsung’s Knox, a toolbox of security features for enterprise-level management of mobile devices. This service is pivotal in how companies manage and secure their mobile devices, especially in a corporate environment.
What It Is
Knox Enrollment Service by Samsung is a tool businesses use to automatically enroll Samsung devices into their management systems when the Itel P55T device is connected to the internet. It’s designed for IT administrators to easily deploy, manage, and enforce policies across devices in their network, ensuring consistency and security.
What It Does
The service allows IT administrators to pre-configure settings and apps and manage other aspects of the Itel P55T device’s functionality. When a device is enrolled, it can be remotely controlled and monitored. The administrators can push updates, track device locations, remotely wipe data for security, and enforce specific compliance policies. This automation of device enrollment simplifies the setup process for both the IT department and the end-user.
Advantages
Of course, Samsung Knox would not be popular without any advantages. Here are some of them:
- Enhanced security. Knox Enrollment Service ensures corporate devices have robust security features. This helps in safeguarding sensitive data against unauthorized access.
- **Streamlined management.**It simplifies the Itel P55T device management, allowing administrators to configure devices without physical access.
- The service enables the customization of devices to fit specific business needs, including installing necessary applications and restrictions on unauthorized apps.
- Compliance Assurance. With the ability to have policies remotely, companies can ensure that all devices comply with corporate standards and regulations.
Disadvantages
However, it also has some disadvantages:
- **Restrictive for users.**For employees, this can mean reduced control over their devices. After all, certain functionalities might be restricted by the employer.
- Potential privacy concerns. The ability of IT administrators to monitor and control devices may raise privacy concerns among employees.
- Complexity in management. While it simplifies many aspects, managing many devices through Knox can become complex. This is particular in diverse environments with different user needs.
Knox Enrollment Service is a powerful tool for enterprise mobile management, offering enhanced security and simplified device management. However, it also introduces challenges, particularly regarding user autonomy and privacy. Understanding these advantages and disadvantages is crucial before removing or bypassing this service.
Part 2: How To Remove Knox Enrollment Service on Your Itel P55T
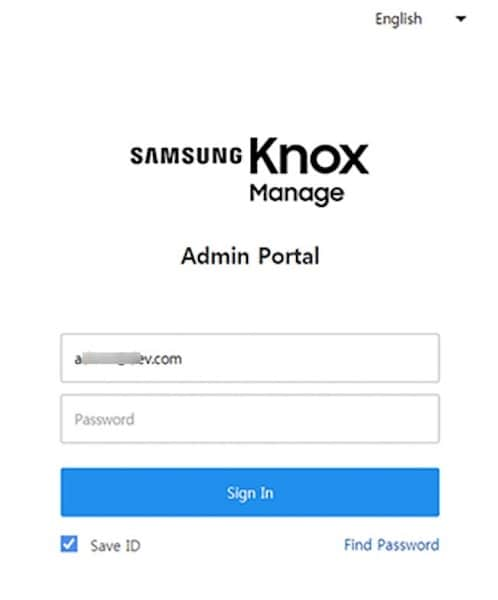
In most cases, an administrator can only effectively remove the Knox Enrollment Service through the Samsung Knox Portal. This typically requires cooperation from your employer.
Here’s a step-by-step guide to removing itfrom the Admin’s Portal:
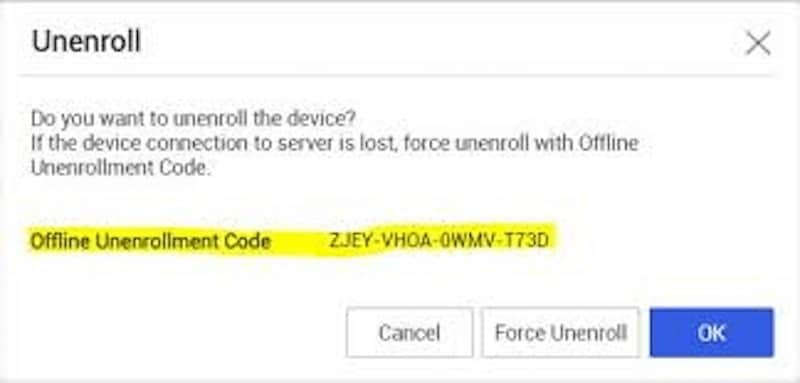
- Step 1: Sign in to the Samsung Knox Portal using administrative credentials.
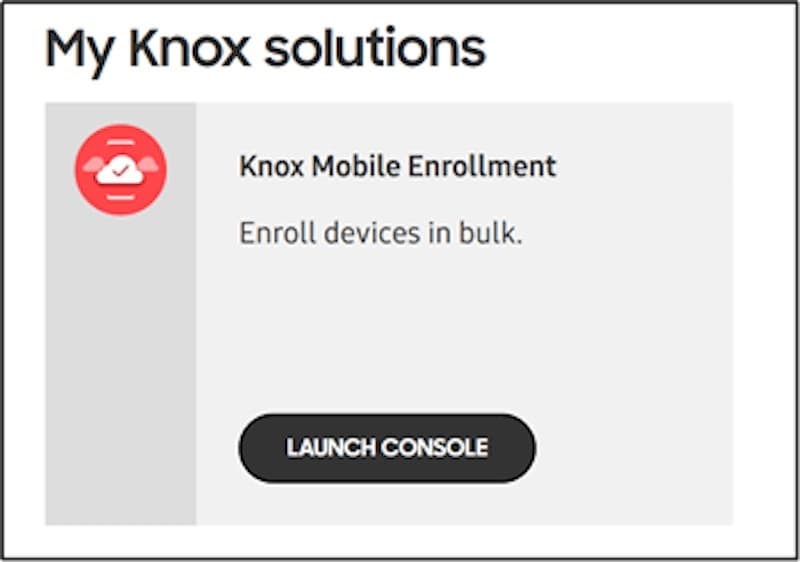
- Step 2: Navigate to Samsung Knox Mobile Enrollment, then click Devices.
- Step 3: Select the Itel P55T device in question and click Actions.
- Step 4: Choose the Clear Profile option to remove all profiles from the Itel P55T device. This action will disassociate the Itel P55T device from any existing Knox configurations.
After removing the Itel P55T device from Knox Enrollment via the admin account, you may still need to uninstall the Knox app from the Android device. This can usually be done through the Itel P55T device’s settings. Navigate to ‘Apps’ in the settings menu, locate the Knox app, and select ‘Uninstall’ or ‘Disable’. Be aware that this option might not be available on all devices, depending on how Knox was configured.
### Rooting and Flashing a New ROM To Remove Knox Enrollment ServiceFor the more tech-savvy users, another method to bypass Knox Enrollment Service is by rooting the Itel P55T device and flashing a new ROM. This process involves gaining root access to the Itel P55T device’s operating system, which allows you to modify the software extensively. After rooting, you can flash a new ROM that doesn’t include the Knox software.
However, this method is risky and not recommended for the average user. It will void your warranty and potentially ‘brick’ your device, rendering it unusable. Furthermore, this action could notify your employer of your attempt to remove Knox, which could have professional repercussions. Proceed with this method only if you know the risks and consequences.
Removing Knox Enrollment Service from your phone is feasible but requires careful consideration, especially in a corporate context. Always ensure you have the necessary permissions and understand the risks of modifying your device’s software.
If You Can’t Use the Above Methods
If none of the above methods are feasible, and you find your phone locked or restricted due to Knox, read through the next section. It will provide additional insights on what to do next.
Part 3: How To Bypass a Locked Phone With a Professional Tool
When faced with a locked phone due to Knox security features, and if conventional methods don’t yield results, turning to a third-party tool can be a viable solution. One such tool known for its efficiency in bypassing phone locks is Wondershare Dr.Fone - Screen Unlock.
Wondershare Dr.Fone is a versatile software suite that tackles various smartphone issues, including unlocking screens. Its Screen Unlock feature is useful for bypassing security barriers without requiring extensive technical knowledge. It hosts several features, such as those you need for data recovery, system repairs, and other smartphone services.
Dr.Fone’s Screen Unlock Feature
The Screen Unlock feature in Dr.Fone is specifically designed to bypass screen locks. Often, you can use it for issues such as forgotten passwords or the like. The great thing is that it can also bypass those locks enforced by Knox. You can do all these without causing data loss or significant changes to your device’s system.
![]()
The Best UnlockJunky Alternative to Bypass FRP and Solve Your Screen Locks
- Remove all Android screen locks (PIN/pattern/fingerprints/face ID) in minutes.
- Bypass the FRP lock of Samsung without a PIN or Google account.
- Everyone can handle the lock screen without any tech knowledge.
- Provide specific removal solutions to promise good success rate.
4,008,669 people have downloaded it
How To Use Dr.Fone - Screen Unlock
- Step 1: Open Dr.Fone and select the Screen Unlock module under Toolbox. Connect your locked phone to the computer using a USB cable.
- Step 2: On the next pages, select Android > Unlock Android Screen.
- Step 3: Find the brand of your device.
- Step 4: Select Remove without Data Loss.

- Step 5: Enter “000000” to start the process after confirming device details.

- Step 6: Follow the instructions to put your device into Download Mode.

- Step 7: After the process is completed, click Done. Don’t be afraid to retry the process if it doesn’t work.
If you find yourself locked out of your phone due to Knox and unable to use conventional methods to regain access, Wondershare Dr.Fone offers a reliable and user-friendly alternative. Its Screen Unlock feature is designed to bypass such security features effectively, ensuring you can regain phone access with minimal fuss.
You May Also Interested:
Tutorial to Change Android IMEI without Root
8 Safe and Effective Methods to Unlock Your iPhone Without a Passcode
How to Unlock OPPO Phone Without Password?
Conclusion
In this article, you’ve explored the intricacies of the Knox Enrollment Service and the steps to remove or bypass it. Key takeaways include understanding what Knox is and its removal or bypass methods. However, securing authorization from your organization or phone provider is important before proceeding. This precaution is crucial to avoid potential complications.
For those facing a locked phone due to Knox and unable to follow conventional methods, Wondershare Dr.Fone emerges as a reliable solution. Its Screen Unlock feature offers a safe and efficient way to regain access to your device, ensuring you stay connected without compromising security.

Unlocking the Power of Smart Lock: A Beginner’s Guide for Itel P55T Users
Google constantly comes up with features to simplify the way users interact and complete tasks on the Android platform. One of the most important features that techies loved to debate about was the Smart Lock Android, a secure password manager functioning in sync with a Google account on the Android phone.
Part 1: What is Android Smart Lock?
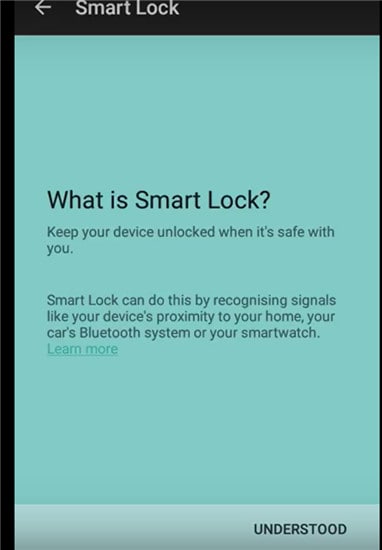
Android Lollipop added a feature called Smart Lock, and the feature was devised as a smart tool to prevent the Android phone from locking once it was initially unlocked. In other words, the feature overrides an Android phone’s Lock Screen feature, thereby saving users the need to enter passwords every time the Itel P55T device locks.
If you’re at home, it’s likely your android phone is locked out if you haven’t accessed at for some time. Smart Locks solves the problem in many ways. It allows you to allocate trusted places. Once you within range of the trusted places, your phone won’t lock. Trusted devices come next. Smart Lock is assigned to Bluetooth and Android NFC unlock devices.

Finally, trusted face unlocking is the ultimate face recognition system that unlocks your Android device as soon as you look at it across the front-facing camera. A face unlock first introduced with Android Jelly Bean and has been significantly improved in later versions.
Turning On Smart Lock
The feature is enabled by first accessing settings. For example, in a Samsung Galaxy S6:
Tap on Settings, which is the gear symbol.
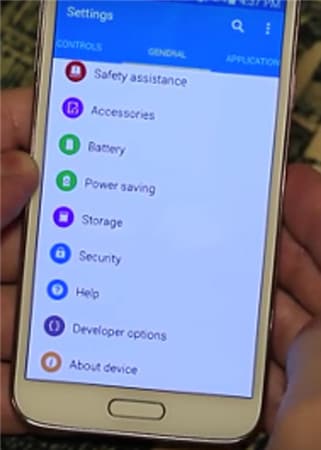
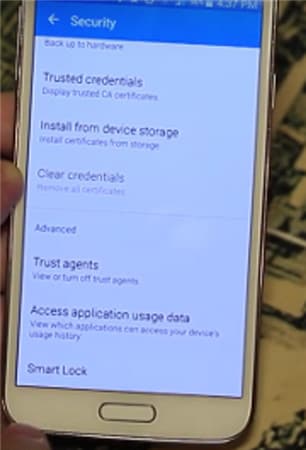
- • Click on Personal and tap on Security.
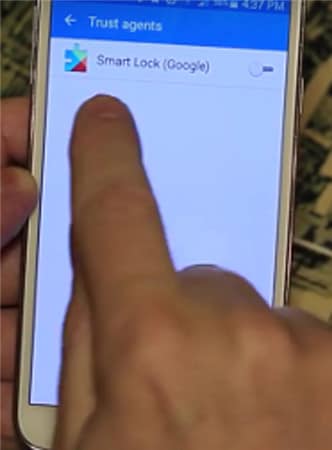
- • Go to Advanced and tap on Trust agents and make sure Smart Lock is turned on.
- • Under Screen Security tap Smart Lock.
- • Here, you need to enter your Screen Lock. If you haven’t done so, set up a password and PIN by following the on-screen prompts. The screen Lock is needed every time you have to change the Smart Lock settings.
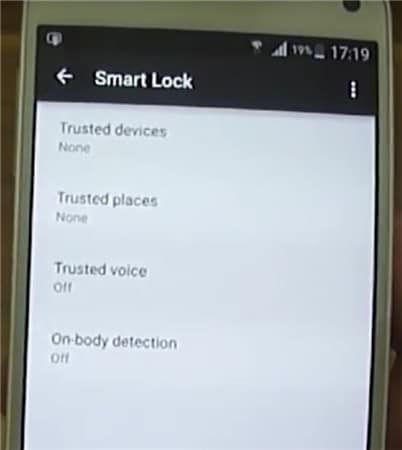
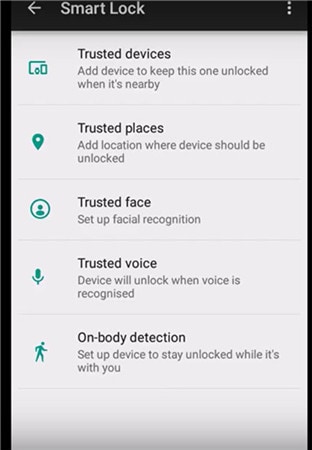
Within Smart Lock, there are three options for setting the system. You can set up trusted devices, trusted face, and trusted places individually, combining two or all three at the same time. You can choose just one trusted face, but you have the option to set up as many trusted devices and trusted places as needed.
Part 2: Turn On Smart Lock For Android with Trusted Devices
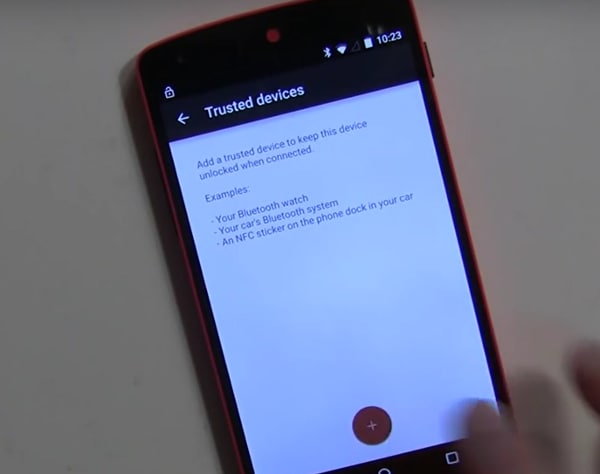
You can decide on a trusted device to be paired with Smart Lock Android.
For example, you can set up a Smart Lock for Bluetooth in your Android Bluetooth settings. It can also be done for Android NFC unlock devices. Examples include the Bluetooth system in your car, NFC unlocks, android sticker on the car’s phone dock, or Bluetooth in your watch.
- • Go to Settings.
- • Tap on Security and then Smart Lock.
- • Existing paired options are listed under Trusted Devices.
- • Initially, trusted devices will show None.
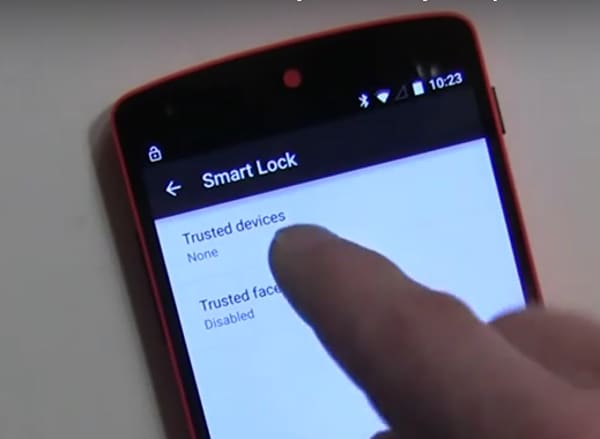
Tap on Add Trusted Devices.
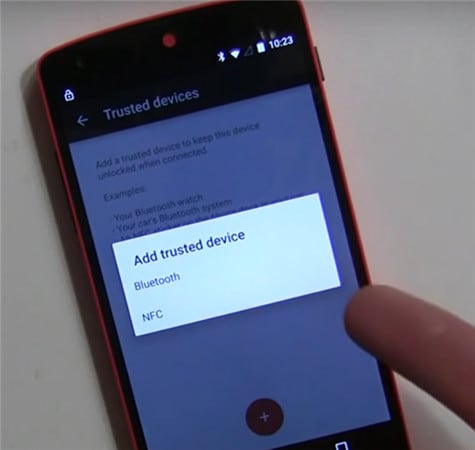
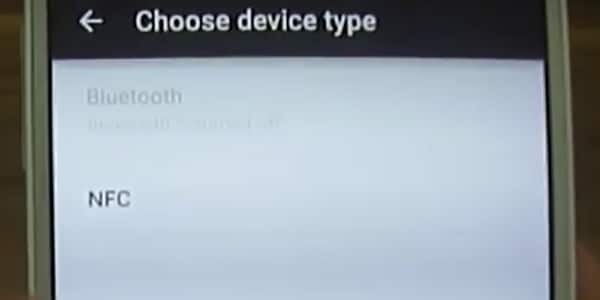
The next screen is the Choose Device Type.

Since you have already paired Bluetooth, it will ask you to choose the Itel P55T device from the list.
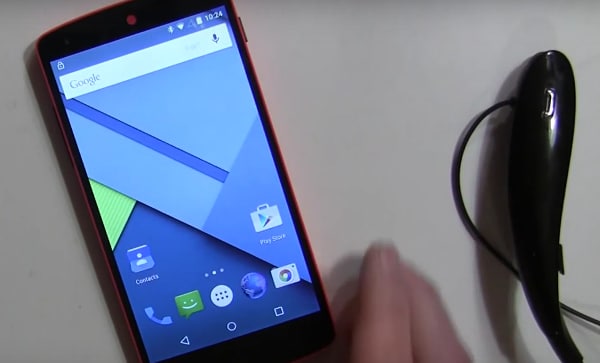
- • As an example, let’s take the case of LG HBS800. It may show Not connected until you add it.
- • It will show up under Trusted devices in the Smart Lock menu.
- • When you turn the added device on, Smart Lock now unlocks the Android mobile.
Similarly, other Bluetooth and NFC unlock android supported gadgets can be added under the list of Trusted Devices.
Part 3: Turn On Smart Lock For Android With Trusted Locations
You can also add locations or addresses to Smart Lock Trusted Locations, and the phone unlocks automatically as soon as you arrive at the desired location. For example, you can set up your home or work address under Trusted Locations.
Check current settings first.

On a new Android phone, visit Settings>Personal.
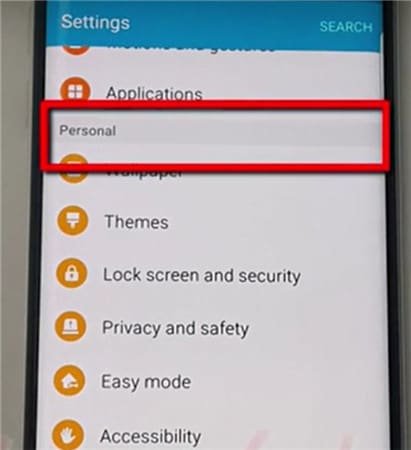
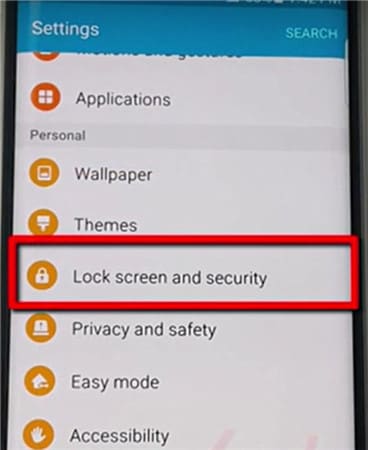
Then Lock Screen and Security.
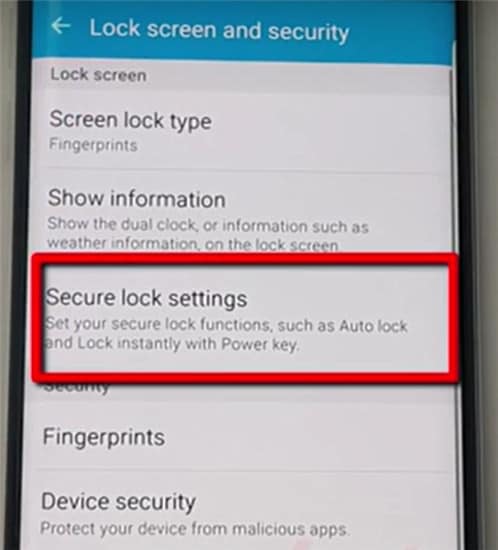
Then Secure Lock Settings.
Tap Smart Lock.
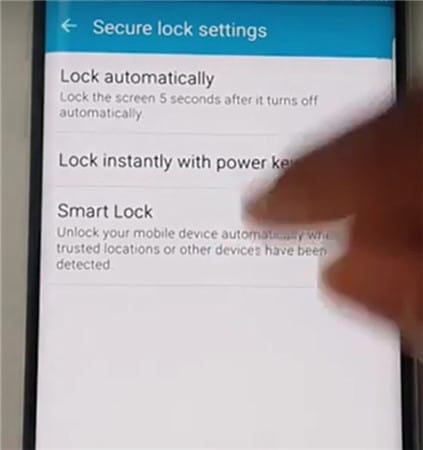
Tap on Trusted Places.
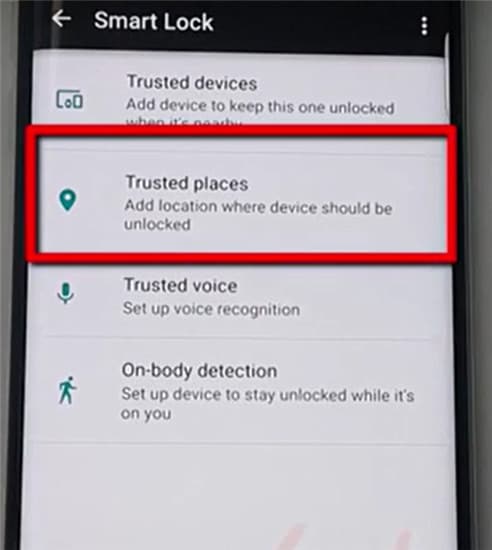
Tap on Add Trusted Places
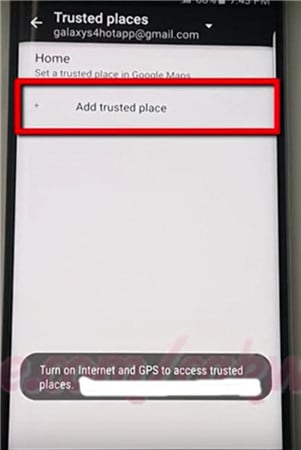
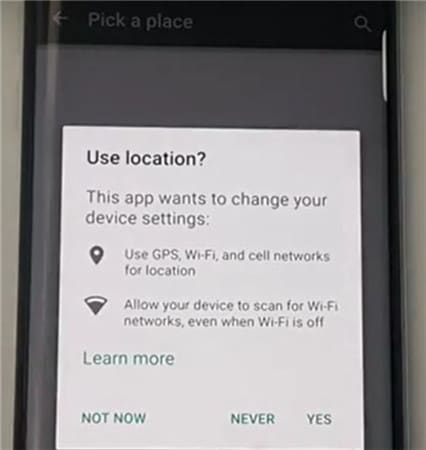
- • Initiate the Google Maps app on the Android phone. Make sure the Internet and GPS are on.
- • Pick a place.
- • Click on Settings.
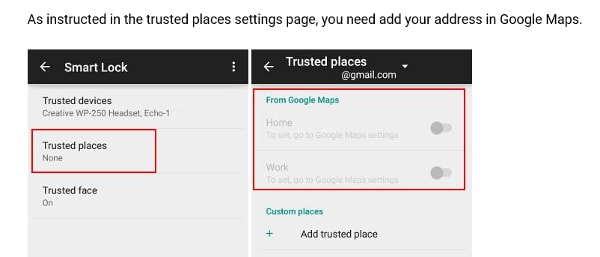
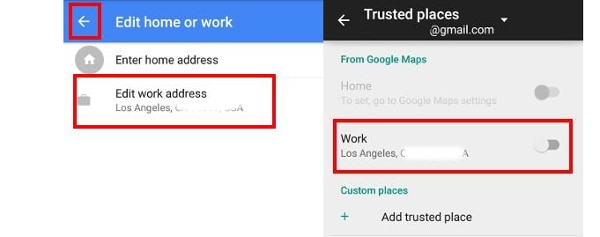
- • Click on Edit home or work. You can now add or edit the required addresses.
- • As an example, click on the Enter work address.
- • You now have the option to type in the address or use the address listed on Google Maps as the required work address.
- • A successful addition is listed and can be edited under the Edit work address.
- • Close the Google Maps app.
- • The work address is automatically propagated and configured with Smart Lock settings.
- • Go back to Settings> Security> Smart Lock> Trusted Places.
- • The work address you added is now listed under Work.
Parental Control Software
- • However, it is not yet configured as a Smart Lock option. Tap the location once, and it is enabled.
- • The switch along the address to the right turns blue, indicating it is enabled.
- • The work address is now listed under Trusted places for Work.
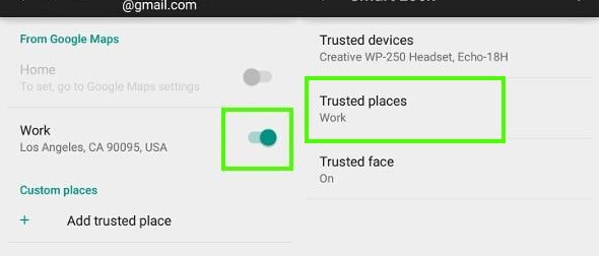
- • The phone is now configured for the work address and will unlock whenever you are at the location.
- • Since it works on Google Maps, the feature works through an Internet connection.
Part 4: Turn On Smart Lock For Android With Trusted Face
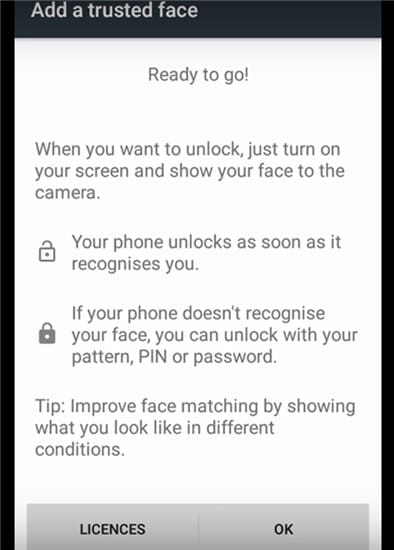
The feature recognizes your face and then unlocks the Itel P55T device. Once you set up the Itel P55T device to recognize your face as a trusted face, it will unlock the Itel P55T device as soon as it recognizes you.
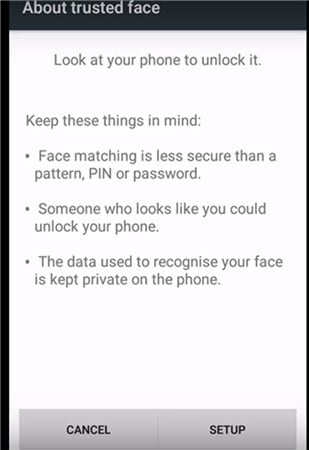
PRECAUTION: At best, this can be the first level of security, as one who resembles you to some extent can unlock the Itel P55T device. Photographs are not stored in the system. The device does hold necessary data to recognize your face, and the security level is determined by how good the Itel P55T device is configured. The data is not accessed by any app or loaded onto a Google server for backup.
Setting Up Trusted Face
- • Go to Smart Lock and tap Trusted Face.
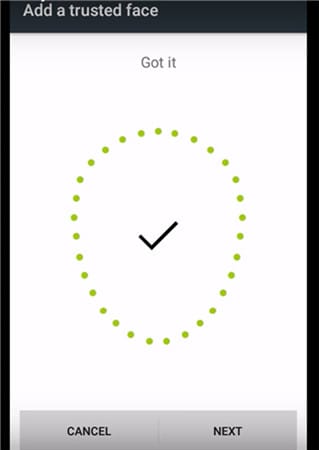
- • Tap on Setup. Follow on-screen instructions.
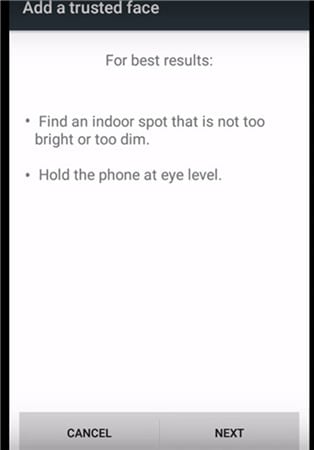
The device begins to gather data about your face. The trusted face icon appears. As a backup, in case Smart Lock does not recognize your face, use the manual system by applying the PIN or password to unlock the Itel P55T device.

In case Trusted Face is not required, tap on reset Trusted Face appearing under the Trusted Face menu. Tap on Reset to reset the option.
How To Improve Facial Recognition In Your Bluetooth and Android NFC Unlock Devices
- • If you feel facial recognition is not up to the mark, go to Smart Lock and tap on a Trusted face.
- • Tap on Improve face matching.
- • Tap on Next and follow instructions on the screen to complete the task.
Smart Lock Android is a great feature and is only going to improve on time. With added security measures being introduced by Google for Bluetooth and NFC unlock android devices, including configuration to Google maps and Gmail, the feature may be one of the most important features to overcome constant blocking of devices even in protected places.
Video on How to Remove Android Lock Screen Without Data Loss
- Title: In 2024, How To Fix OEM Unlock Missing on Itel?
- Author: Marry
- Created at : 2024-07-18 16:08:42
- Updated at : 2024-07-19 16:08:42
- Link: https://unlock-android.techidaily.com/in-2024-how-to-fix-oem-unlock-missing-on-itel-by-drfone-android/
- License: This work is licensed under CC BY-NC-SA 4.0.