
In 2024, How to Remove a Previously Synced Google Account from Your Vivo Y100i Power 5G
How to Remove a Previously Synced Google Account from Your Vivo Y100i Power 5G
The setting up process of a new Android phone requires you to add a Google account that saves all activities and data of the phone like search history, details of online shipping, play store purchases, and more. Once the account is set, it cannot be changed till you delete everything from your phone. Moreover, with the introduction of FRP lock, even a factory reset will not remove the synced Google account.

So, now what if you want to sell your phone or have purchased a second-hand device that is still associated with the previous owner’s Google account? No, worries as there are workarounds available that will help you remove your previously synced google account from your Android device.
Keep reading to know more in detail about how to bypass previously synced google accounts.
Heres a full guide on how to remove google account from android, click to know more!
Part 1: Remove Previously Synced Google Account from Android Phone Without Phone Reset
In this part, we will discuss the methods that can be used for removing the previously synced account from your Android phone without a phone reset.
Method 1: Removing Google Account using the Android Settings Menu
If you just plan to reset your phone, maybe because of the lag caused by the phone cache, and you know the inconvenience of Google FRP as a protection mechanism, then you can remove Google FRP through the Settings menu.
The steps for this method are listed below.
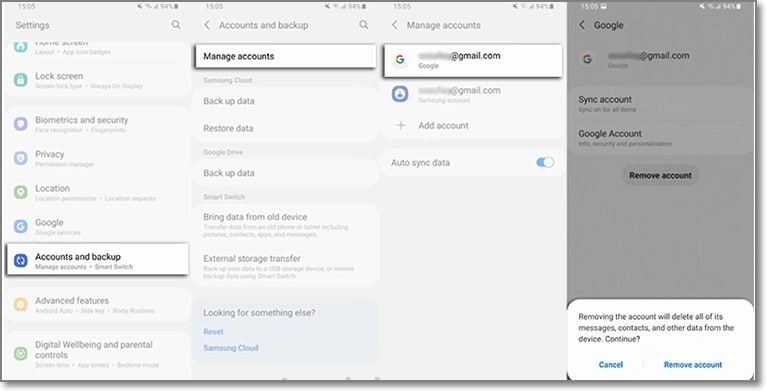
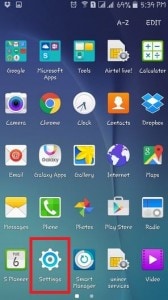
- Step 1: On your Android phone go to the Settings option and choose Accounts & Backup.
- Step 2: Select the Manage Accounts option now and the list of the associated Google Devices will appear.
- Step 3: Choose and click on the Google Account that you want to remove and a pop-up message will appear to inform you that all the account data will be deleted with this action.
To confirm the removal of the account, click on the Remove account button.
Method 2: Remove the Google account from the Android phone using the computer
There is another method using which you can remotely remove the Google account associated with your phone. The steps for the method are listed below.
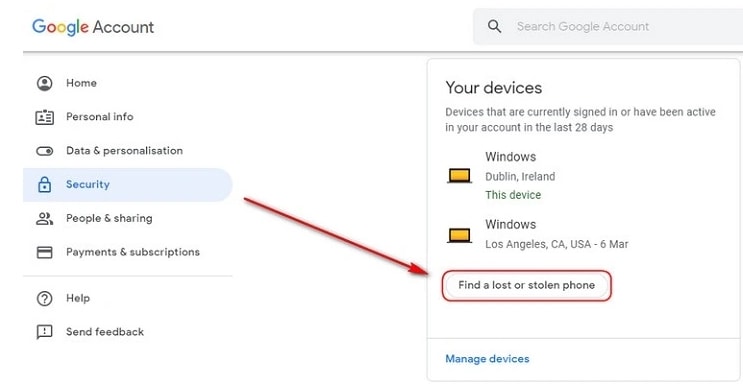
- Step 1: Using another device or a PC, sign in to your Google account that was previously synced on this device and choose the Security option.
- Step 2: Next scroll down and then tap on the Your devices option and choose to Manage devices.
- Step 3: You will now see the list of devices linked to your Google account. Next, tap on Find a lost or stolen phone and then select the Remove option present next to Account access.
- Step 4: You will be again asked if you want to delete the account. Select the Remove option.
- Step 5: The account will be removed successfully and the confirmation message will appear.
Note: This method will actually sign out you from the Google account and will not delete it permanently. To again get access to the account, a notification will appear on your phone to enter the password.
Part 2: How to Disable Factory Reset Protection to Bypass Google Account Verification After Factory Reset
The Factory Reset Protection (FRP) is a security feature for the Android device that allows factory reset only after the associated Google ID and password are entered correctly. With multiple accounts and passwords to remember there is quite a possibility that you may forget your Android phone Google account details and here the need to bypass Google account verification arises.
Though there are multiple tools available we recommend Dr. Fone - Screen Unlock (Android) as the best and the most reliable option. Using this excellent Windows and Mac-based software, FRP lock on all popular Android devices including Samsung, LG, HTC, and others. The tool is simple to use and requires no technology. There is also an option where you can unlock your device if you do not know the OS version.
![]()
Dr.Fone - Screen Unlock (Android)
Get into Locked Phones within Minutes
- 4 screen lock types are available: pattern, PIN, password & fingerprints.
- Easily remove the lock screen; No need to root your device.
- Everybody can handle it without any technical background.
- Provide specific removal solutions to promise good success rate
4,008,669 people have downloaded it
Steps to remove FRP lock using Dr. Fone-Screen Unlock (Android)
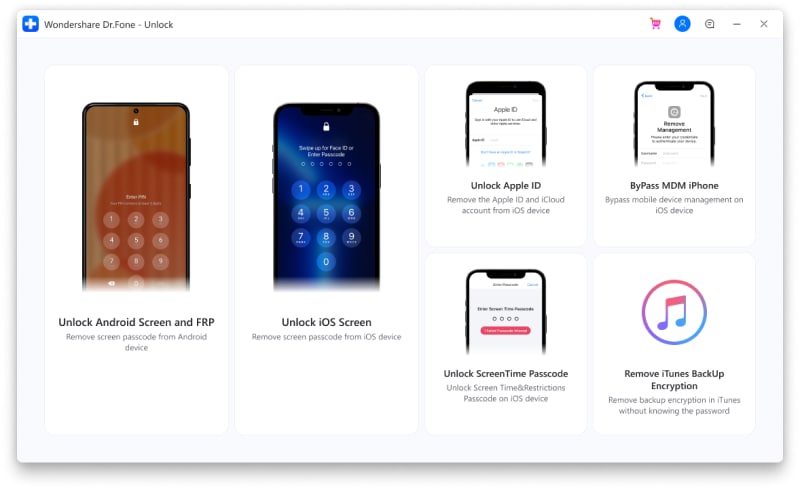
Step 1: Download, install and run the software on your system, and from the main interface choose the Screen Unlock option. Make sure that your phone is connected to WiFi.

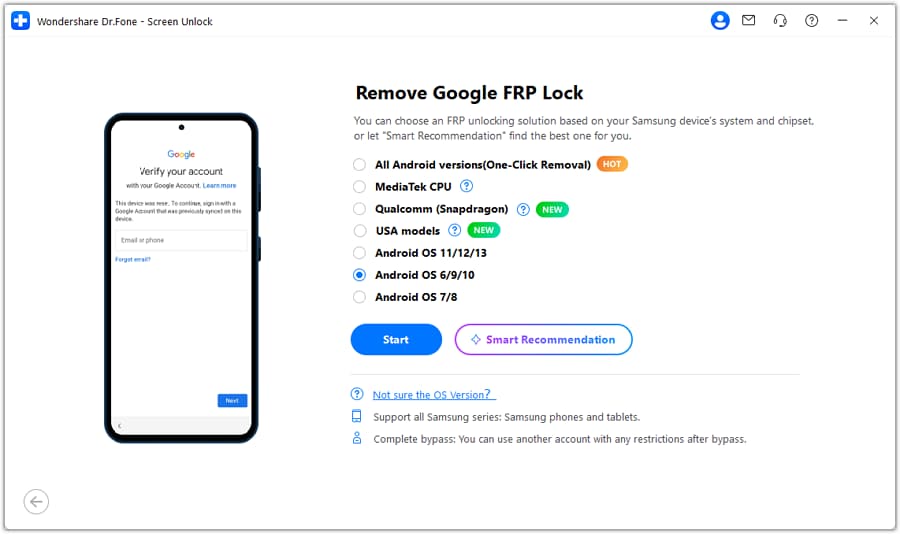
Step 2: Next, choose Unlock Android Screen/FRP and then select the Remove Google FRP Lock option.
Step 3: Next, choose the OS version of your device from the given options, and then using a USB cable, connect your phone to your system.
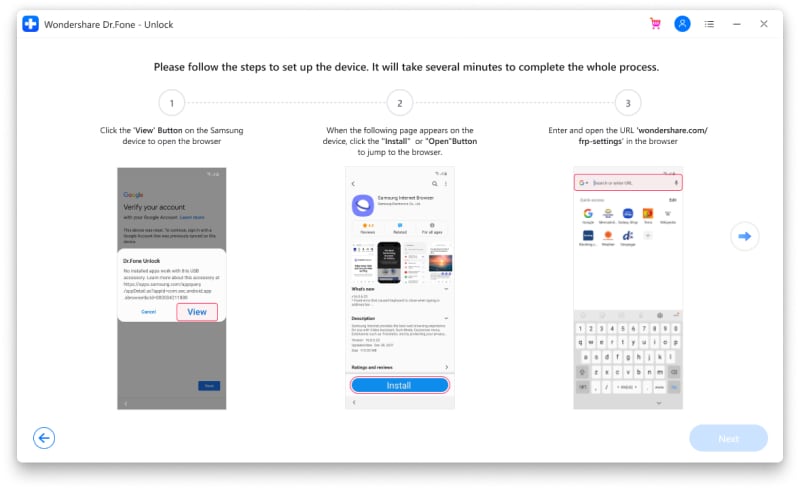
Step 4: After the Vivo Y100i Power 5G device is connected, the Vivo Y100i Power 5G device information will appear on the software for you to confirm and the notification for the same will be sent to your Android phone.
Step 5: Now follow the notifications for removing the FRP lock and in the browser enter drfonetoolkit.com.
Step 6: Next, click on the Android 6/9/10 button, choose Open Settings and select the PIN option to set a PIN to be used in the further steps.
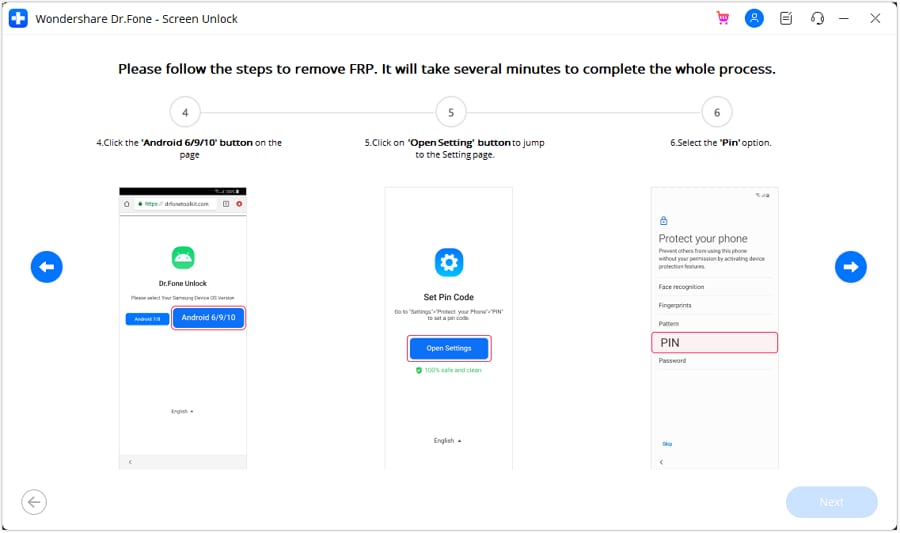
Step 7: Keep following the steps as they appear till you reach the Google Account Sign-In page. Here click on the Skip option that will successfully remove and bypass the Google Account.

The above given are the brief steps for the FRP bypass process. To learn about the entire process in detail, check Dr.Fone-Screen Unlock (Android) guide .
Part 3: Hire a Remote FRP Removal Service to Bypass ZTE/Motorola After Factory Reset
To bypass the FRP lock on your ZTE, Motorola, and Samsung device, there is also an online service called UnlockJunky.com that claims to remove the FRP lock and previously linked account on your Android device within 5-15 minutes. This is a paid service that also claims that if they are unable to remove the lock, they will refund the amount to their customers.
So, if you cannot sign in with a Google account that was previously synced, you can give this, method a try.
Step 1: Open the official service page Unlockjunky on your browser.
Step 2: Next, choose the Vivo Y100i Power 5G device’s brand, model, and unlock type from their respective drop-down menus. Click on Unlock Now button after entering the details.
Step 3: Now you need to initiate the order by providing the details asked and completing the payment.
Step 4: Next, the software needs to be downloaded and installed on your system, and using a USB cable, connect your phone to your computer.
Step 5: Connect with one of the support provider members through the live chat and they will help you remove the FRP lock on your Android phone.
With the steps above, you can remove the account previously synced on this device.

Limitations of using the Unlockjunky method:
- This is a paid service.
- Works only with Motorola, ZTE, and Samsung devices.
- There is no surety that the service will work for removing the FRP lock on your devices.
- If you have to remove the FRP lock from multiple devices, a separate payment for each device has to be done.
Conclusion
Above we have listed several ways to remove a previously synced Google account on your Android device. The best of all the listed solutions is Dr. Fone - Screen Unlock (Android) as it supports bypassing FRP lock on multiple Android devices in a hassle-free manner. Once the license is purchased, you can unlock as many numbers of devices as you want without any worries.
The Ultimate Guide to Vivo Y100i Power 5G Pattern Lock Screen: Everything You Need to Know
Do you want to revamp your phone’s pattern lock screen and give it a new life? Well, you are not the only one! Lots of Android users keep looking for numerous ways to change their screen lock pattern and make it more secure. After all, if your lock screen pattern is strong, then it will certainly keep an intruder away. In today’s world, our privacy is everything and we should take every needed measure to protect it. To help you do the same, we have come up with this informative guide. Read on and learn how to set up a strong pattern lock screen on your device and what to do if you have forgotten it.
Part 1: How to set up Pattern Lock Screen on Vivo Y100i Power 5G?
Out of all the provided options for screen locks, pattern lock is mostly used due to its ease of access and added security. If you haven’t set up a screen lock pattern on your device, then we recommend you to do the same right away. Not only will it keep intruders away, it will also protect your privacy. To learn how to set up a lock screen pattern on an Android device, simply follow these steps:
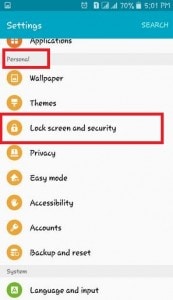
- 1. Firstly, unlock your device and go to its Settings. You can access it from the Home Screen or from its Notification Center.
- 2. Under the personal or privacy section, you can access the “Lock Screen and Security” option.
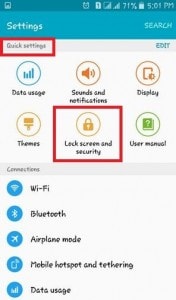
- 3. In some versions, the option is also listed right at the top of the settings (in its quick access).
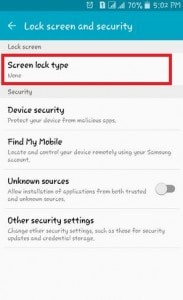
- 4. To set up a pattern lock screen, tap on the “Screen lock type” feature.
- 5. This will provide a list of all the different kinds of locks that you can apply. Ideally, it would be password, pin, pattern, swipe, or none. In “Swipe”, you can unlock a device just by swiping the screen. Whereas, in pattern, pin, or password, you would be needed to provide the respective pattern/pin/password to unlock the Vivo Y100i Power 5G device.
- 6. We recommend setting up a lock screen pattern instead. To do this, tap on the “Pattern” option.


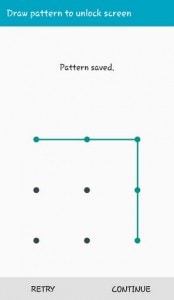
- 7. From the next screen, you can simply draw any kind of pattern of your choice. Ideally, it should join at least 4 dots on the screen. We recommend using a strong screen lock pattern to provide unmatched security to your device.
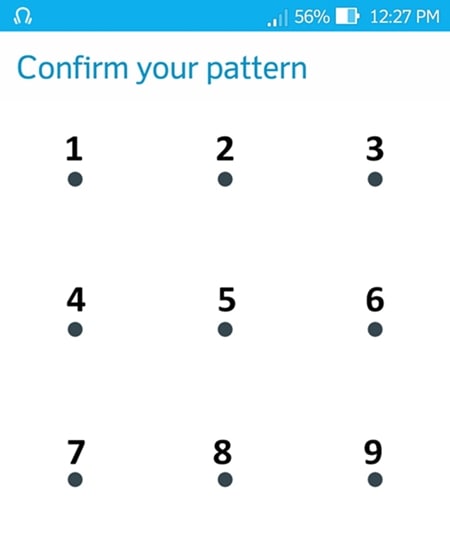
- 8. Furthermore, you need to confirm your choice and provide the same pattern once again. Make sure that you draw the same pattern here.
- 9. Additionally, the interface will ask you to provide a security pin as well. In case if you will forget your pattern, then you can access your phone by taking the assistance of this pin.

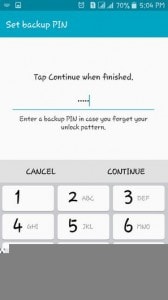
- 10. Similarly, you would be required to confirm the pin as well to finish the setup.
- 11. That’s it! By completing these steps, a screen lock pattern will be implemented on your device.
Later, you can follow the same drill to change your device’s lock screen pattern as well. Though, you would be needed to provide the existing pattern to access these features. Out of all the lock screen options, you should go with the pattern lock. Not only it is the most accessible option, it also provides fast results with an added security.
Part 2: What to do if you forget Android pattern lock?
After following the above-mentioned tutorial, you would be able to set up a pattern lock screen on your device. Since it is recommended to have a strong pattern lock, users often forget their pattern lock after implementing it. This prohibits them from using their own Android device. If you have a similar experience, then don’t worry. There are plenty of ways to unlock a device and remove its pattern lock without causing any harm to the system. Visit our informative tutorial and learn different ways to unlock or bypass the Android pattern lock screen.
Out of all the provided options, it is recommended to use Dr.Fone - Screen Unlock (Android) . It provides fast and reliable results without getting rid of your device’s content. The tool is a part of the Dr.Fone toolkit and is already compatible with all the leading Android smartphones. By following its simple click-through process, you can unlock the screen lock pattern on your device in no time. Although this tool can help you keep all data after unlocking screen passcode on your Samsung or LG phone, it will wipe all data after unlocking other Android phone including Huawei, Oneplus and so on.
Dr.Fone - Screen Unlock (Android)
Remove 4 Types of Android Screen Lock without Data Loss
- It can remove 4 screen lock types - pattern, PIN, password & fingerprints.
- Only remove the lock screen, no data loss at all.
- No tech knowledge asked, everybody can handle it.
- Work for Samsung Galaxy S/Note/Tab series, and LG G2, G3, G4, etc.
4,820,695 people have downloaded it
Part 3: Top 10 Hardest pattern lock ideas for Android
Your pattern lock is one of the most important security aspects on your device. Anyone can access your phone after decoding your pattern lock. Needless to say, if you have a simple pattern lock on your device, then it can easily be accessed by someone else. To help you set up a strong pattern lock screen, we have handpicked some of the hardest combinations. Have a look at these lock screen pattern combinations and choose the one you like the most!
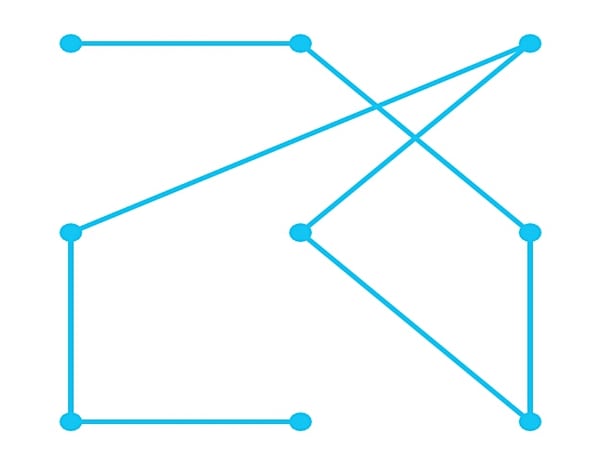
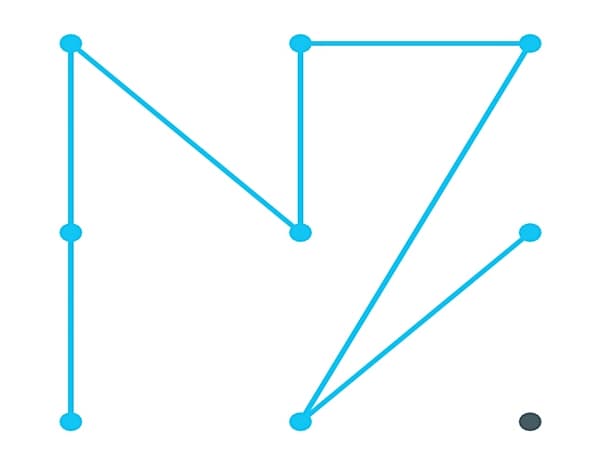
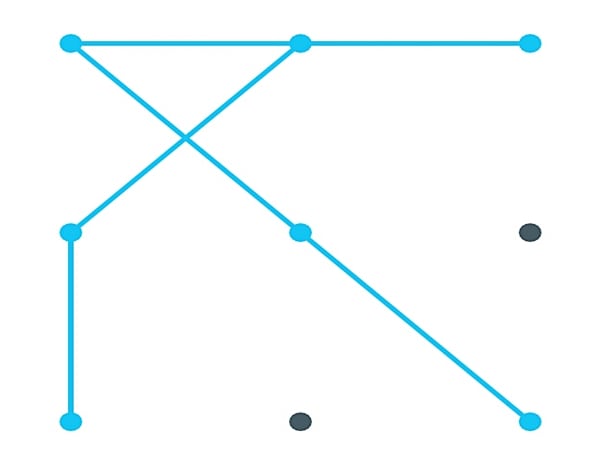
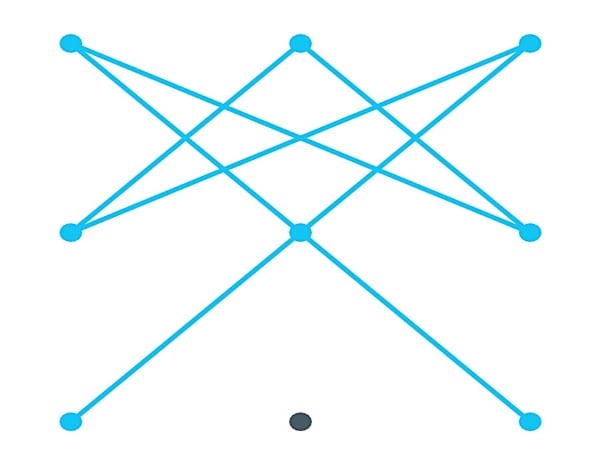
For your convenience, we have marked the dots as 1-9. This will help you know the exact sequence of the lock.
1
8 > 7 > 4 > 3 > 5 > 9 > 6 > 2 > 1
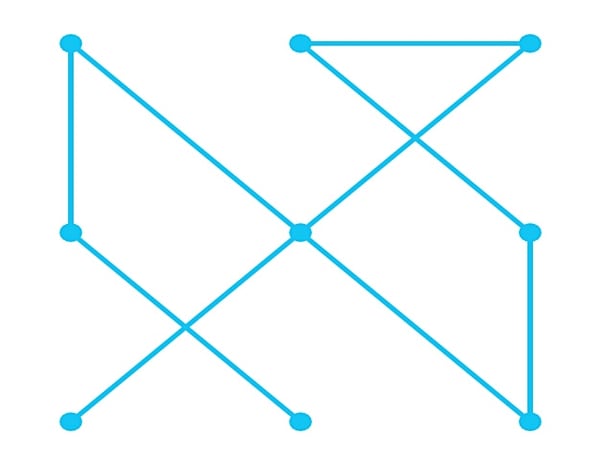
2
7 > 4 > 1 > 5 > 2 > 3 > 8 > 6
3
1 > 8 > 3 > 4 > 9

4
7 > 4 > 2 > 3 > 1 > 5 > 9
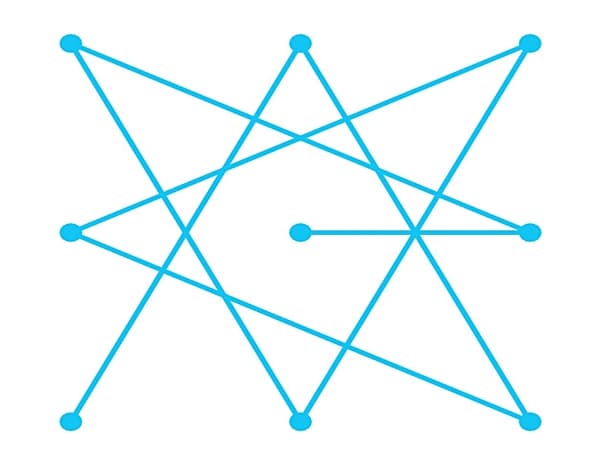
5
2 > 4 > 1 > 5 > 8 > 9 > 6 > 3 > 7


6
8 > 4 > 1 > 5 > 9 > 6 > 2 > 3 > 7
7
7 > 2 > 9 > 4 > 3 > 8 > 1 > 6 > 5

8
5 > 7 > 2 > 9 > 1 > 4 > 8 > 6 > 3
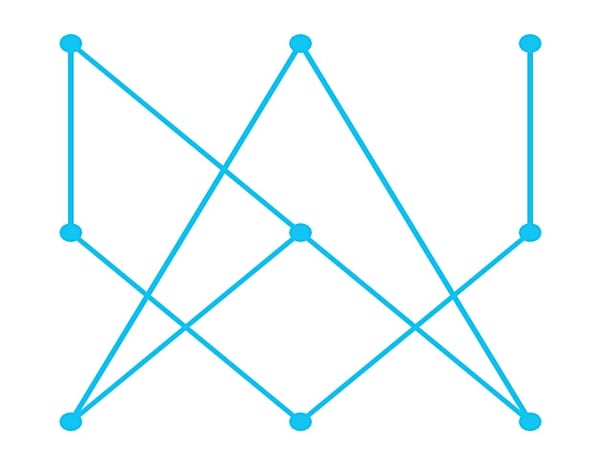
9
1 > 5 > 9 > 4 > 8 > 2 > 6 > 3 > 7

10
7 > 5 > 3 > 4 > 2 > 6 > 1 > 9
After selecting and setting up a new screen lock pattern on your device, make sure that you remember it. You can lock and unlock your phone a few times with your new pattern lock in order to memorize it. Nevertheless, if you forget your lock screen pattern, then you can take the assistance of Dr.Fone Android Pattern Lock Removal to get an instant solution.
Now when you know every essential thing about pattern lock screen on Android, you can certainly keep your device safe from any unforeseen intrusion. A strong lock screen pattern will certainly be of a great use to you. It will protect your apps, data, and device accessibility in an effortless manner. Go ahead and set up a strong and secure pattern lock screen on your device and provide an added layer of security to it.

Unlocking the Power of Smart Lock: A Beginner’s Guide for Vivo Y100i Power 5G Users
Google constantly comes up with features to simplify the way users interact and complete tasks on the Android platform. One of the most important features that techies loved to debate about was the Smart Lock Android, a secure password manager functioning in sync with a Google account on the Android phone.
Part 1: What is Android Smart Lock?
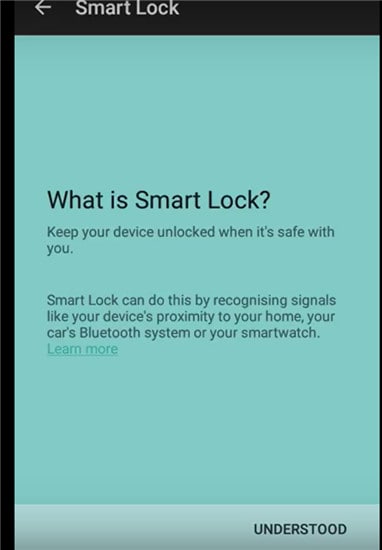
Android Lollipop added a feature called Smart Lock, and the feature was devised as a smart tool to prevent the Android phone from locking once it was initially unlocked. In other words, the feature overrides an Android phone’s Lock Screen feature, thereby saving users the need to enter passwords every time the Vivo Y100i Power 5G device locks.
If you’re at home, it’s likely your android phone is locked out if you haven’t accessed at for some time. Smart Locks solves the problem in many ways. It allows you to allocate trusted places. Once you within range of the trusted places, your phone won’t lock. Trusted devices come next. Smart Lock is assigned to Bluetooth and Android NFC unlock devices.

Finally, trusted face unlocking is the ultimate face recognition system that unlocks your Android device as soon as you look at it across the front-facing camera. A face unlock first introduced with Android Jelly Bean and has been significantly improved in later versions.
Turning On Smart Lock
The feature is enabled by first accessing settings. For example, in a Samsung Galaxy S6:
Tap on Settings, which is the gear symbol.
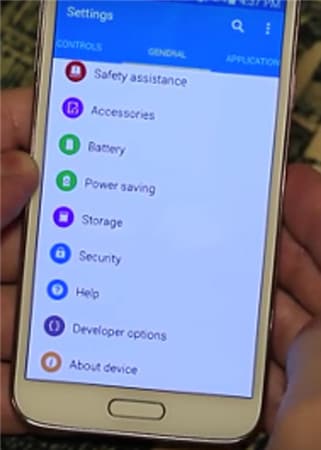
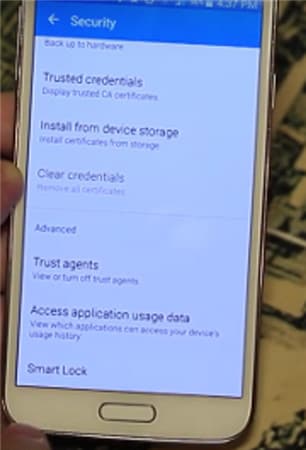
- • Click on Personal and tap on Security.
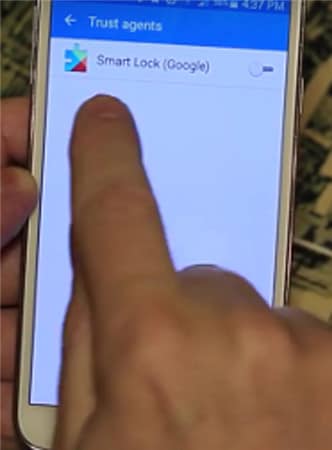
- • Go to Advanced and tap on Trust agents and make sure Smart Lock is turned on.
- • Under Screen Security tap Smart Lock.
- • Here, you need to enter your Screen Lock. If you haven’t done so, set up a password and PIN by following the on-screen prompts. The screen Lock is needed every time you have to change the Smart Lock settings.
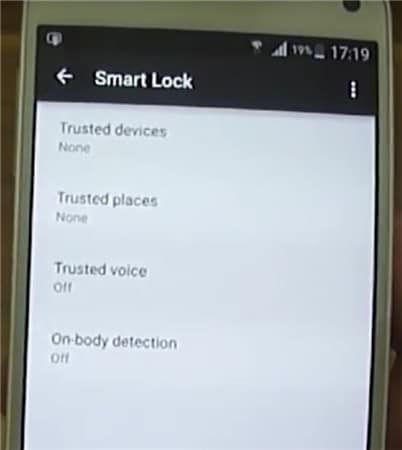
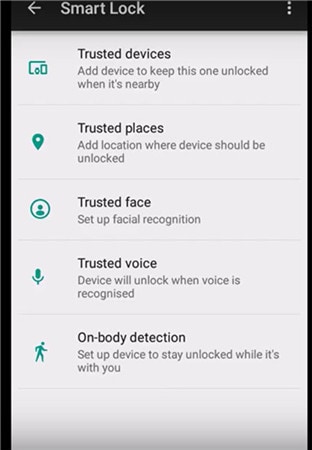
Within Smart Lock, there are three options for setting the system. You can set up trusted devices, trusted face, and trusted places individually, combining two or all three at the same time. You can choose just one trusted face, but you have the option to set up as many trusted devices and trusted places as needed.
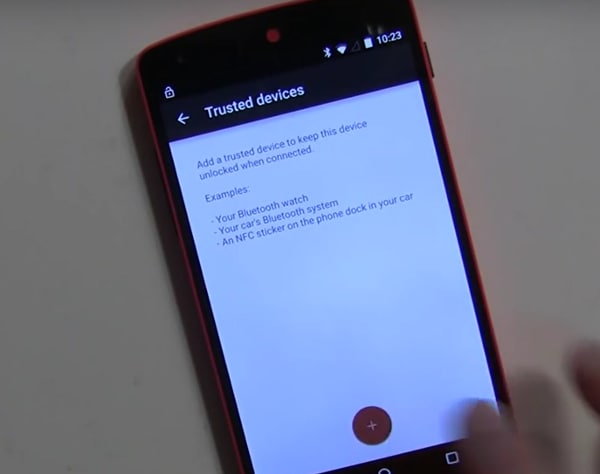
Part 2: Turn On Smart Lock For Android with Trusted Devices
You can decide on a trusted device to be paired with Smart Lock Android.
For example, you can set up a Smart Lock for Bluetooth in your Android Bluetooth settings. It can also be done for Android NFC unlock devices. Examples include the Bluetooth system in your car, NFC unlocks, android sticker on the car’s phone dock, or Bluetooth in your watch.
- • Go to Settings.
- • Tap on Security and then Smart Lock.
- • Existing paired options are listed under Trusted Devices.
- • Initially, trusted devices will show None.
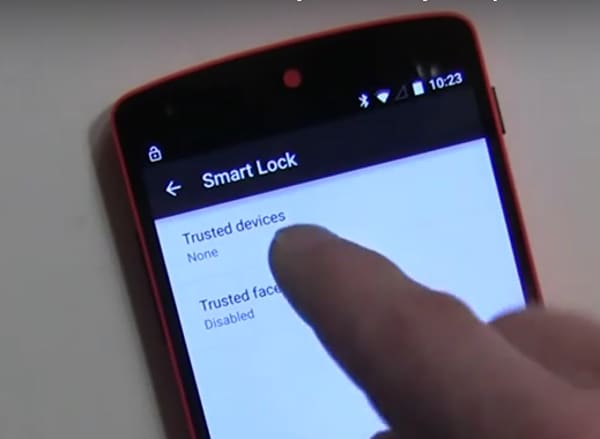
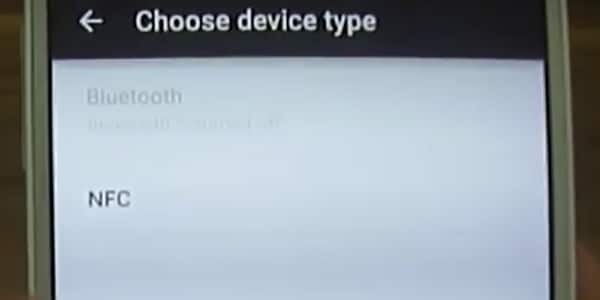
Tap on Add Trusted Devices.
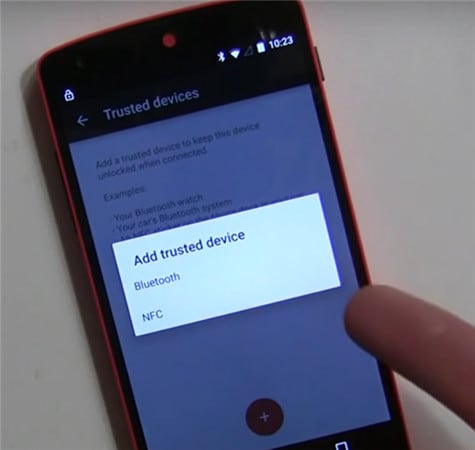
The next screen is the Choose Device Type.

Since you have already paired Bluetooth, it will ask you to choose the Vivo Y100i Power 5G device from the list.
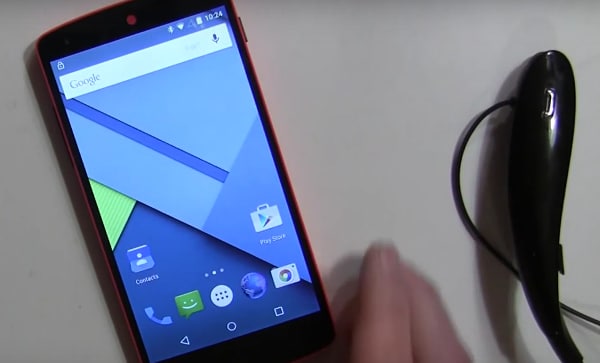
- • As an example, let’s take the case of LG HBS800. It may show Not connected until you add it.
- • It will show up under Trusted devices in the Smart Lock menu.
- • When you turn the added device on, Smart Lock now unlocks the Android mobile.
Similarly, other Bluetooth and NFC unlock android supported gadgets can be added under the list of Trusted Devices.
Part 3: Turn On Smart Lock For Android With Trusted Locations
You can also add locations or addresses to Smart Lock Trusted Locations, and the phone unlocks automatically as soon as you arrive at the desired location. For example, you can set up your home or work address under Trusted Locations.
Check current settings first.

On a new Android phone, visit Settings>Personal.
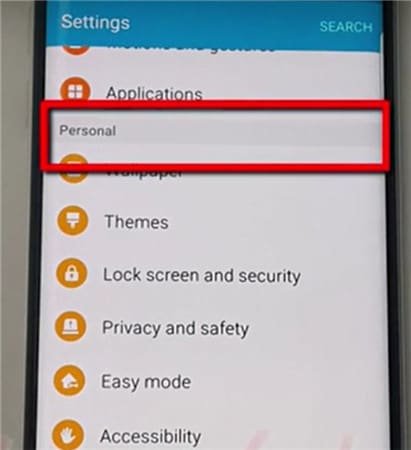
Then Lock Screen and Security.
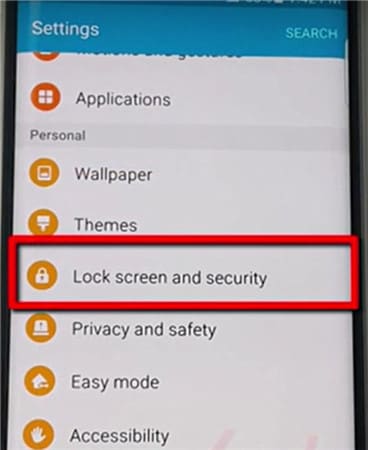
Then Secure Lock Settings.
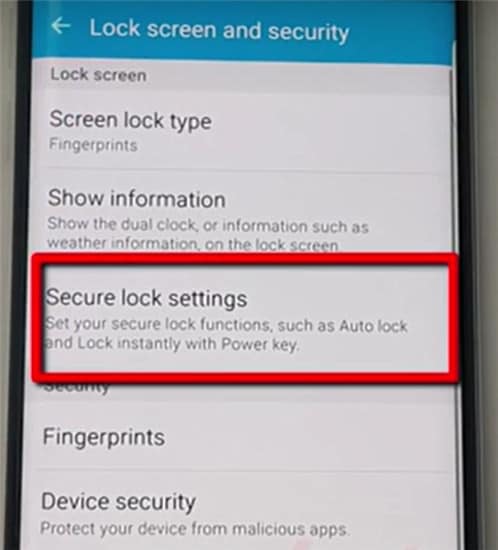
Tap Smart Lock.
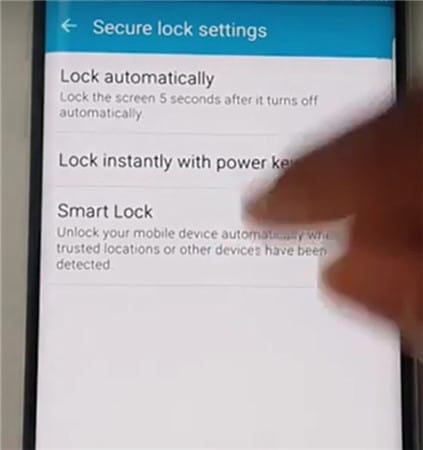
Tap on Trusted Places.
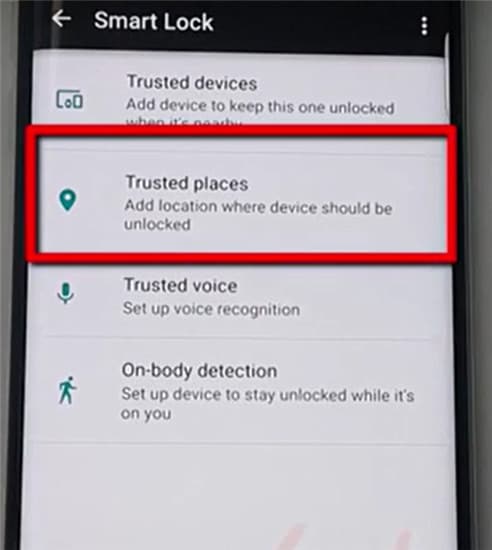
Tap on Add Trusted Places
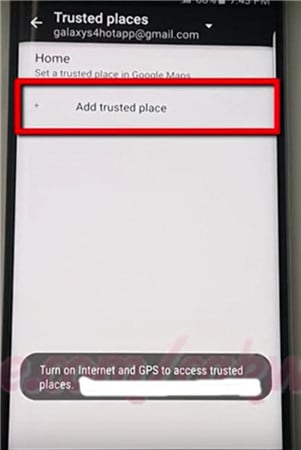
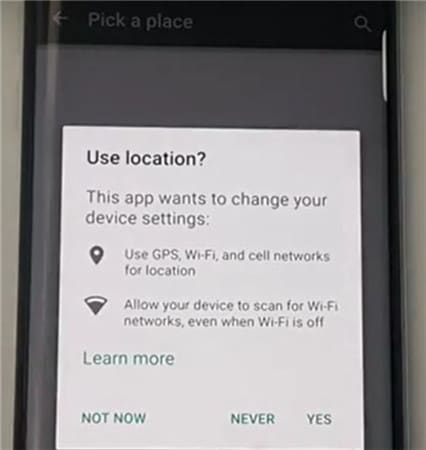
- • Initiate the Google Maps app on the Android phone. Make sure the Internet and GPS are on.
- • Pick a place.
- • Click on Settings.
- • Click on Edit home or work. You can now add or edit the required addresses.
- • As an example, click on the Enter work address.
- • You now have the option to type in the address or use the address listed on Google Maps as the required work address.
- • A successful addition is listed and can be edited under the Edit work address.
- • Close the Google Maps app.
- • The work address is automatically propagated and configured with Smart Lock settings.
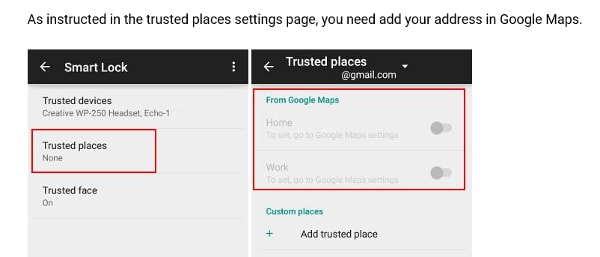
- • Go back to Settings> Security> Smart Lock> Trusted Places.
- • The work address you added is now listed under Work.
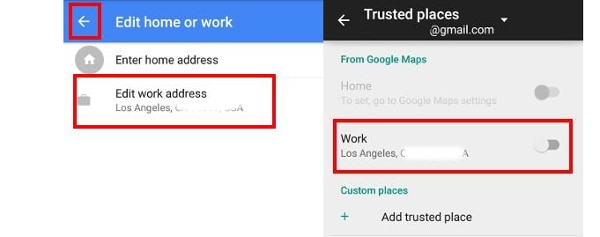
- • However, it is not yet configured as a Smart Lock option. Tap the location once, and it is enabled.
- • The switch along the address to the right turns blue, indicating it is enabled.
- • The work address is now listed under Trusted places for Work.
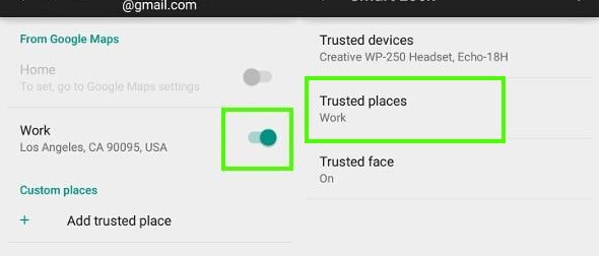
- • The phone is now configured for the work address and will unlock whenever you are at the location.
- • Since it works on Google Maps, the feature works through an Internet connection.
Part 4: Turn On Smart Lock For Android With Trusted Face
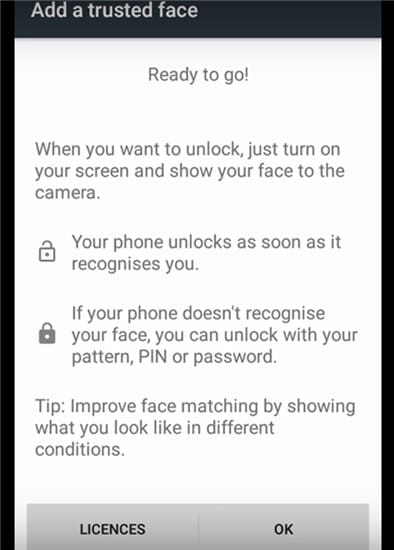
The feature recognizes your face and then unlocks the Vivo Y100i Power 5G device. Once you set up the Vivo Y100i Power 5G device to recognize your face as a trusted face, it will unlock the Vivo Y100i Power 5G device as soon as it recognizes you.
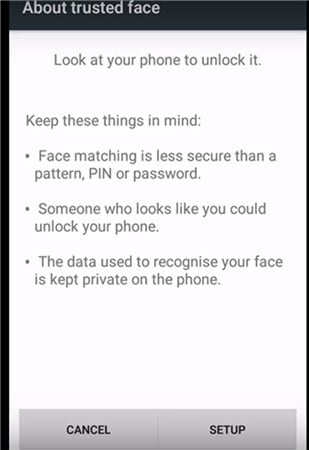
PRECAUTION: At best, this can be the first level of security, as one who resembles you to some extent can unlock the Vivo Y100i Power 5G device. Photographs are not stored in the system. The device does hold necessary data to recognize your face, and the security level is determined by how good the Vivo Y100i Power 5G device is configured. The data is not accessed by any app or loaded onto a Google server for backup.
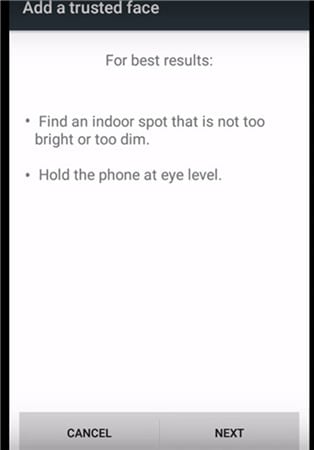
Setting Up Trusted Face
- • Go to Smart Lock and tap Trusted Face.
- • Tap on Setup. Follow on-screen instructions.
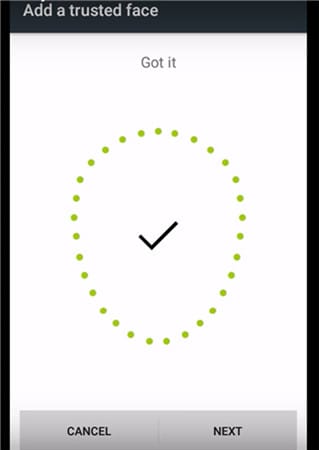
The device begins to gather data about your face. The trusted face icon appears. As a backup, in case Smart Lock does not recognize your face, use the manual system by applying the PIN or password to unlock the Vivo Y100i Power 5G device.
In case Trusted Face is not required, tap on reset Trusted Face appearing under the Trusted Face menu. Tap on Reset to reset the option.
How To Improve Facial Recognition In Your Bluetooth and Android NFC Unlock Devices
- • If you feel facial recognition is not up to the mark, go to Smart Lock and tap on a Trusted face.
- • Tap on Improve face matching.
- • Tap on Next and follow instructions on the screen to complete the task.
Smart Lock Android is a great feature and is only going to improve on time. With added security measures being introduced by Google for Bluetooth and NFC unlock android devices, including configuration to Google maps and Gmail, the feature may be one of the most important features to overcome constant blocking of devices even in protected places.
Video on How to Remove Android Lock Screen Without Data Loss
- Title: In 2024, How to Remove a Previously Synced Google Account from Your Vivo Y100i Power 5G
- Author: Marry
- Created at : 2024-07-18 12:35:45
- Updated at : 2024-07-19 12:35:45
- Link: https://unlock-android.techidaily.com/in-2024-how-to-remove-a-previously-synced-google-account-from-your-vivo-y100i-power-5g-by-drfone-android/
- License: This work is licensed under CC BY-NC-SA 4.0.