
In 2024, How to Use Google Assistant on Your Lock Screen Of Vivo V30 Lite 5G Phone
How to Use Google Assistant on Your Lock Screen Of Vivo V30 Lite 5G Phone
Android has undergone numerous changes to enhance user experience and security. One notable feature that was once present was the ability to unlock phones with voice Google Assistant. However, Google Assistant has removed this feature across all versions since 2021.
While this voice-unlocking feature is no longer available, there are still many things you can do with Google Assistant, even when the Vivo V30 Lite 5G device is locked. This tool brings an added layer of convenience to your smartphone experience.
Let’s dig deeper into how you can use Google Assistant on the lock screen and make the most out of this tool in the following article.
Part 1. What You Can Do With Voice Google Assistant
Google Assistant is a virtual assistant powered by artificial intelligence (AI) developed by tech giant Google. This application is readily available on most recent mobile phone models, especially those operating on Android 6.0 and newer versions.
Although you can no longer use the Google Assistant unlock feature, you can still perform a myriad of tasks using Google Assistant. These include:
- Getting the weather
- Setting alarms
- Playing music
- Sending texts
- Making a call
- Asking Google for information, etc.
Enable Google Assistant on Lock Screen: A Step-by-Step Guide
Now that you’re eager to try the potential of Google Assistant on your lock screen, let’s walk through the simple steps on how to enable this tool.
- Step 1: Open Google Assistant:
Look for “Google Assistant” and open the app.
- Step 2: Ask Google Assistant to open the settings.
You can ask, “Hey Google, open the Google Assistant settings,” and it will show you the Google Assistant settings.
- Step 3: Allow Google Assistant on the lock screen.
Locate the “Lock Screen” settings and make sure to switch on “Assistant responses on lock screen.”


Part 2. How To Use Google Assistant on Lock Screen
After you’ve successfully enabled Google Assistant on your lock screen, let’s see how to use Google Assistant to do certain tasks more efficiently and hands-free.
- Step 1: Wake Up Google Assistant
Start by waking up Google Assistant. You can do this by saying the wake word “Hey Google” or “OK Google.” If it doesn’t work, you can long-press the home button or use any dedicated gesture to activate Google Assistant.
- Step 2: Issue a Voice Command
Once Google Assistant is active, issue a voice command related to the task you want to perform. For example:
“Hey Google, what’s the weather today?”
“OK Google, set an alarm for 5 PM.”
“Hey Google, play my Spotify playlist.”
When you can still unlock with Google Assistant, you can ask it to “unlock my phone” or use any similar command.
- Step 3: Interact with Responses
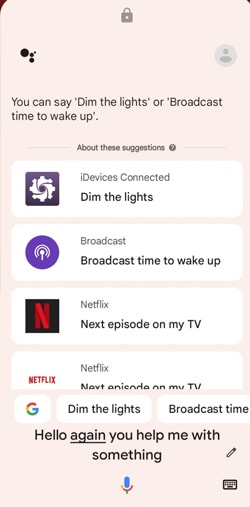
Google Assistant will then provide spoken responses and display relevant information on the lock screen. For instance, if you ask for the weather, it might verbally provide the current conditions and display a brief summary on your lock screen.

Part 3. Common Problems When Using Google Assistant
Unable to use Google Assistant to unlock phone is not the only drawback that users may have encountered in recent changes. Although Google Assistant on the lock screen presents a revolutionary way to interact with your phone, like any technology, it also comes with its share of challenges. Some of the common problems when using Google Assistant are:
- Misunderstandings and misinterpretations
One prevalent issue users encounter is Google Assistant misunderstanding or misinterpreting voice commands. This can be influenced by factors such as background noise, accent variations, or pronunciation differences.
- Limited context understanding
While Google Assistant is adept at understanding individual commands, it may struggle with complex, multi-step requests that rely heavily on context. Break down your tasks into simpler commands to enhance comprehension and execute it more accurately.
- Inability to execute certain tasks
Google Assistant’s capabilities are extensive, but there are instances where it may struggle to execute specific tasks. For example, it can’t execute tasks that involve interacting with certain third-party applications or services. You can’t also unlock phone with voice Google Assistant.
Tips to Make Voice Google Assistant Recognize Your Commands
One of the most infuriating problems with voice Google Assistant is that users often encounter difficulties in having their commands accurately recognized. To enhance the accuracy of voice recognition with Google Assistant, you can consider implementing the following tips:
- Speak Clearly and Naturally
Make sure that you speak in a clear and natural manner. Avoid mumbling or speaking too quickly. Enunciate your words, giving Google Assistant a better chance to interpret your commands accurately.
- Use Simple and Direct Phrases
Keep your commands simple and direct. Avoid unnecessary elaboration or complex sentence structures. Google Assistant is more likely to understand straightforward commands.
- Check Your Microphone
Ensure that your device’s microphone is in good working condition. Dirt or debris on your phone’s microphone can affect its performance. Clean the microphone area and try again.
- Quiet Environment
Background noise can interfere with voice recognition. Try to issue commands in a quiet environment to minimize any potential confusion caused by external sounds.

Part 4. How to Unlock Android Phone Screen Without Passcode
Now, you know that you can’t unlock phone via Google Assistant anymore. But what if you accidentally forget your phone’s passcode? Is there a reliable method to regain access to your Android device without the passcode?
Fortunately, Wondershare Dr.Fone offers a straightforward solution for precisely such scenarios. It provides a simple and effective way to unlock your Android phone screen through Dr.Fone - Screen Unlock when the screen lock is forgotten or becomes inaccessible.
![]()
Dr.Fone - Screen Unlock (Android)
The Best UnlockJunky Alternative to Solve Your Screen Locks
- Completely unlinked from the previous Google account, it won’t be traced or blocked by it anymore.
- Remove all Android screen locks (PIN/pattern/fingerprints/face ID) in minutes.
- Compatiable with various Android models.
- Provide specific removal solutions to promise good success rate.
4,008,670 people have downloaded it
If you are wondering how to unlock your Android phone screen without a passcode with Dr.Fone – Screen Unlock, follow the steps below.
- Step 1: Launch the Screen Unlock Tool
Open the latest version of Wondershare Dr.Fone on your computer and connect your phone device using a USB cable. Once connected, navigate to the Toolbox > Screen Unlock to access Dr.Fone – Screen Unlock tool.

- Step 2: Select Android for your device type.
As the Dr.Fone Screen Unlock tool supports both Android and iOS, you will need to indicate the specific device you are using. Opt for the Android option if you are unlocking an Android device. Then, continue to choose “Unlock Android Screen” on the next screen.

- Step 3: Remove Screen Lock Without Data Loss
- In this step, you will be directed to select your device brand. Choose the Android device brand you are using and opt for “Remove without Data Loss” if you don’t want to lose your data.

- Step 4: Define Device Details
Next, make sure to check and confirm the Brand, Device Name, and Device Model to unlock your Android screen. Tick the checkmark that says you agree with the warning and are ready to proceed. Click “Next” to unlock your screen.

- Step 5: Confirm to Unlock Screen
Type “000000” continue by clicking Confirm.


- Step 6: Put Android in Download Mode
Dr.Fone will then guide you to put your Android device into Download Mode according to the model you have identified. After you have followed the instructions, Dr.Fone will automatically lead to the next screen to proceed the unlocking process.

After that, you can monitor the progress and wait for a few minutes until it shows “Unlocked successfully.”
You May Also Interested:
Unlocking Your Realme Phone Made Easy: Step-by-Step Guide
8 Safe and Effective Methods to Unlock Your iPhone Without a Passcode
Complete Guide to Unlock Mi Account Without Password In 2024

Conclusion
Google Assistant is a versatile virtual assistant that is designed to help you with a wide range of tasks and make your daily life more convenient. Accessible on most modern Android devices, it enables users to perform several tasks through voice commands.
However, if you are looking for ways to unlock phone with Google Assistant, this function is no longer available. Google Assistant unlock feature has been discontinued since 2021. But in case you’ve forgotten the screen lock passcode, you can use Wondershare Dr.Fone Screen Unlock tool to regain access to your Android phone. This tool facilitates the unlocking process without data loss, featuring a user-friendly learning curve.
How To Fix OEM Unlock Missing on Vivo V30 Lite 5G?
Original Equipment Manufacturer (OEM) Unlock is a function on Android devices. It allows you to unlock your phone bootloader. A bootloader or bootstrap loader gathers the operating system files, loads them into memory, and hands over control, essentially starting your device. Unlocking the bootloader assists you in installing custom ROMs, flashing custom kernels, and rooting your phone.
However, this freedom comes with some trade-offs. Most manufacturers will void your warranty if you unlock the bootloader, and it can also make your phone face higher risks of malware and other security threats. Additionally, it can be difficult to relock the bootloader once you unlock it.
If you encounter the OEM unlock missing on your Android phone despite wanting to unlock your bootloader, this article can help. You will learn the step-by-step guide for the different methods to fix the missing OEM unlock option. Before diving into solutions, let’s explore why this option might be unavailable in the first place.

Part 1: Why Is OEM Unlock Missing on Your Device?
Finding that OEM Unlock is missing on your Android phones can be frustrating, particularly if you plan to modify your software or install a custom ROM. But don’t worry. There are several possible explanations for this. Let’s explore some of the most common reasons:
Manufacturer Restrictions
The Missing OEM Unlock option can often be due to restrictions imposed by your device’s manufacturers. They may intentionally remove this option to safeguard device security and compatibility. It is common with carrier-locked devices. As a result, the OEM Unlock option may not show.
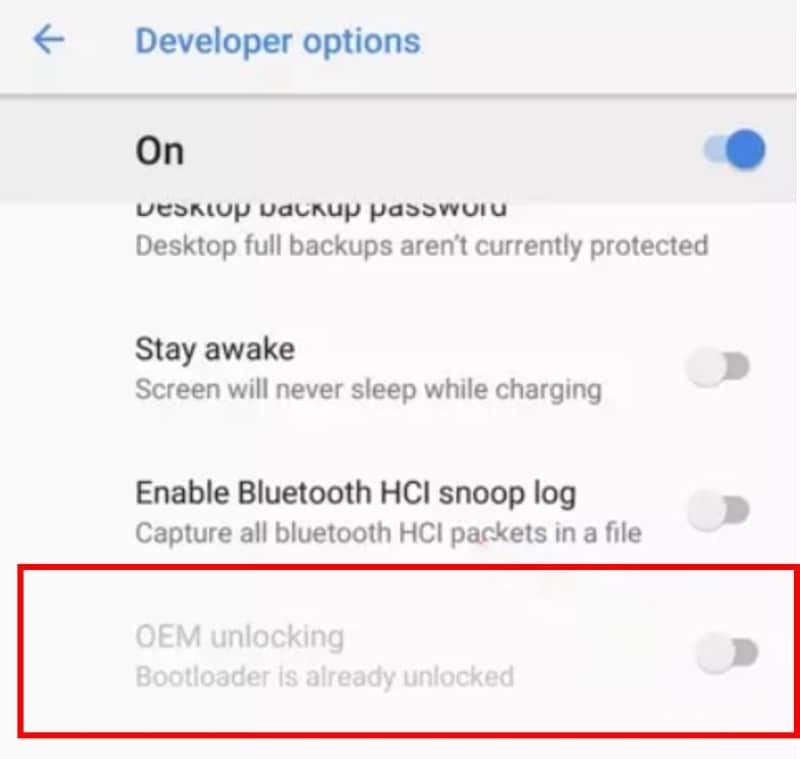
Bootloader Already Unlocked
In some cases, the Android OEM Unlock Missing issue arises when the bootloader has already been unlocked. Relocking the bootloader might make the option reappear. But exercise caution as this process can erase device data.
Developer Options Not Enabled
It might seem obvious, but sometimes the simplest things get overlooked. The OEM Unlock option can only be accessed from within Developer Options. If this menu isn’t enabled, you won’t see it.
Carrier-Locked Devices
The OEM Unlock Missing issue can also occur if your device is carrier-locked. Carriers often impose restrictions to prevent users from switching networks, and bootloader unlocking is one way to do that. Unfortunately, the missing OEM Unlock option is usually intentional, and unlocking your device can be more complicated.
Security Features
Enhanced security features, like Samsung’s KNOX, can sometimes conceal the OEM Unlock option. Temporarily turning off these features might show the option, but it’s crucial to be aware of the potential security implications of doing so.
Corrupted Bootloader
A corrupted bootloader can also lead to the Android OEM Unlock missing problem. The bootloader plays a role in the boot process, and if it’s damaged, it might not display the necessary options. This can be caused by software glitches, failed flashing attempts, or even hardware issues. In this scenario, you might need to consult your device’s manufacturer or a technical specialist to help repair or re-flash the bootloader.
Connectivity Issues
A poor connection between your device and computer can also prevent the OEM Unlocking from showing up. Check your cables and try using different USB ports to ensure a stable connection.
Part 2: How To Enable Missing OEM Unlock Without a Password?
Unlocking your phone’s bootloader (OEM Unlock) varies across models and brands. Some need a passcode or PIN after rebooting the phone, while others don’t. Even if your phone doesn’t require a separate password, your existing screen lock (password, PIN, pattern) will usually be needed to enable the missing OEM unlock option.
But what if you forgot that, too? Wondershare Dr.Fone - Screen Unlock can help bypass forgotten passwords and unlock your phone even if you don’t have the technical knowledge. Here’s a quick breakdown of its key features in this area:
- Success Rate
High success rate for bypassing various lock screen types, including PIN code, pattern lock, passwords, and fingerprints.
- Ease of Use
Provides a concise and intuitive interface that guides users with clear instructions and on-screen prompts.
- Comprehensive Features
Dr.Fone - Screen Unlock tool can remove the Android phone lock screen without resetting your Samsung or LG device. It can also help you bypass Google Factory Reset Protection (FRP) on mainstream Android brands.
- Extensive Device Compatibility
Aside from Samsung and LG, it covers a wide range of popular Android brands like Vivo, Huawei, Xiaomi, Oppo, etc.
Regain control in minutes with Dr.Fone. First, download the app to your desktop and install it. Once it’s up and running, launch Dr.Fone and prepare to unlock your device with ease. You’ll find detailed instructions below – even if you don’t know your phone’s lock screen, Dr.Fone has you covered.
- Step 1: Select Screen Unlock from the Toolbox homepage. Then, establish a connection between your locked Android device and your computer using a USB cable.
- Step 2: Specify the Vivo V30 Lite 5G device type for screen lock removal.

- Step 3: Select Unlock Android Screen to proceed.
- Step 4: Choose the brand of your phone from the supported brands.

Note:
The following steps will vary based on your device’s manufacturer. Please refer to the instructions on your screen to proceed into Download or Recovery mode.
- Step 5: The screen unlock process is underway. If it encounters trouble, click Try Again. Once Dr.Fone successfully unlocks your Android device, tap Done.

Now that you’ve regained access to your device thanks to Dr.Fone - Screen Unlock, you can move forward with enabling the OEM unlock missing option. Next up, we’ll guide you through the steps in several ways. Let’s start with the Developer options.
Part 3: How To Enable OEM Unlock Missing From the Developer Options?
Developer Options, a hidden menu in Android, offers advanced features like app debugging and custom ROM installation. But if the Android OEM unlock option is missing, you can’t unlock your device’s bootloader. Below is a step-by-step guide for you so the OEM unlock missing option will show in the Developer Options. Remember, this process may erase your device data, so a complete backup is essential before proceeding.
- Step 1: Open the Settings app on your Android phone.
- Step 2: Navigate to About Phone at the bottom of the list, then tap Software information.

- Step 3: Tap on the Build number repeatedly (7 times) until you see a message saying, “You are now a developer!“ or similar.
- Step 4: Go back to Settings > System and find the Developer options menu.
- Step 5: Scroll down and tap the toggle switch next to Enable OEM Unlock to turn it on.

- Step 6: A warning message explaining the risks of turning on the OEM unlock will appear. Read it carefully and tap Enable if you want to proceed.

- Step 7: Enter your PIN or password to confirm the unlock when prompted
- Step 8: Your device will reboot, and OEM Unlocking will be enabled.
Part 4: How To Fix OEM Unlock Missing by Adjusting Date and Time?
Some manufacturers intentionally delay the availability of the OEM unlock after a software update for security reasons. Changing the date to a past date before the update rolled out can trick the system into displaying the option, as it thinks the update hasn’t happened yet. It is a temporary fix, and the option will likely disappear again later when the Vivo V30 Lite 5G device automatically syncs the correct date.
If you intend to try this method, follow these steps to enable OEM unlock missing or greyed out after an Android update:
- Step 1: Open the Settings app.
- Step 2: Go to System or General management, depending on your Android version.
- Step 3: Tap on Date and Time.
- Step 4: Turn off Automatic date and time.

- Step 5: Tap on Set date and choose the desired older date from the calendar.
- Step 6: Tap on Set time and choose the desired time from the clock.
- Step 7: Tap on Done to save the changes.
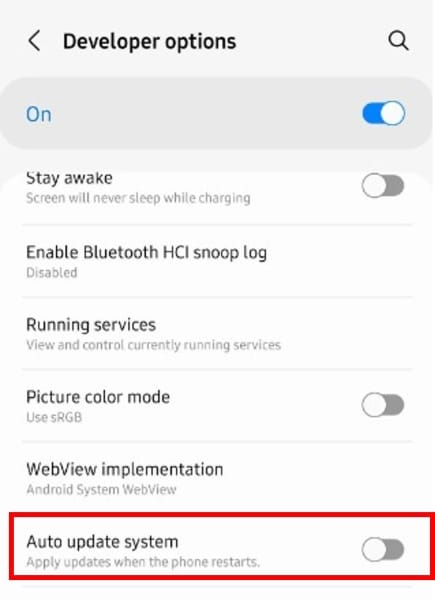
- Step 8: Go back to the Developers options and turn off the Auto update system option.
- Step 9: Go to Settings > Software update, then turn off Auto download over Wi-Fi.

This method should enable the OEM unlock missing issue. Otherwise, proceed to the next section for another solution.
Part 5: How To Fix OEM Unlock Missing by Removing SIM Card?
Certain carriers restrict bootloader unlocking on their devices to ensure compatibility and prevent unauthorized modifications. For these phones, unlocking the SIM card becomes crucial before you can toggle the OEM unlock option. Here are the steps to fix the OEM Unlock missing or greyed out using SIM card removal:
- Step 1: Use the SIM ejector tool (often included with your phone) or a small pin to push the tray out.
- Step 2: Go to Settings > General Management > Reset, then select Factory data reset. Enter your PIN or password if needed.

- Step 3: Review the warning and tap Reset to confirm.
- Step 4: Once the reset is complete, your phone will restart. Connect to Wi-Fi when prompted.
- Step 5: Skip any prompts to log in to your Google or email account. Then, repeat the process to open the Developer Options in the previous sections.
Conclusion
Having the OEM Unlock missing or greyed out can leave Android users feeling locked out of customization possibilities. Fortunately, this article has outlined helpful solutions like enabling the Android OEM Unlock missing option via the Developer Options. You can also try other methods above, like adjusting date and time settings or even a sim card removal trick. For those facing forgotten lock screens, we’ve offered guidance on bypassing them using the Dr.Fone - Screen Unlock tool to access the necessary phone settings.
While these methods provide a solid foundation, it’s always wise to research steps specific to your phone model. And never forget – caution is key. If things get technical, don’t hesitate to seek help from online communities or professional repair services.
Tips: Forget your device password and can’t get access to it? No worries as Dr.Fone is here to help you. Download it and start a seamless unlock experience!
Unlocking the Power of Smart Lock: A Beginner’s Guide for Vivo V30 Lite 5G Users
Google constantly comes up with features to simplify the way users interact and complete tasks on the Android platform. One of the most important features that techies loved to debate about was the Smart Lock Android, a secure password manager functioning in sync with a Google account on the Android phone.
Part 1: What is Android Smart Lock?
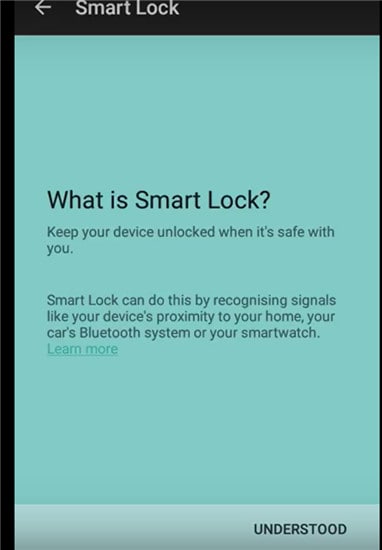
Android Lollipop added a feature called Smart Lock, and the feature was devised as a smart tool to prevent the Android phone from locking once it was initially unlocked. In other words, the feature overrides an Android phone’s Lock Screen feature, thereby saving users the need to enter passwords every time the Vivo V30 Lite 5G device locks.
If you’re at home, it’s likely your android phone is locked out if you haven’t accessed at for some time. Smart Locks solves the problem in many ways. It allows you to allocate trusted places. Once you within range of the trusted places, your phone won’t lock. Trusted devices come next. Smart Lock is assigned to Bluetooth and Android NFC unlock devices.

Finally, trusted face unlocking is the ultimate face recognition system that unlocks your Android device as soon as you look at it across the front-facing camera. A face unlock first introduced with Android Jelly Bean and has been significantly improved in later versions.
Turning On Smart Lock
The feature is enabled by first accessing settings. For example, in a Samsung Galaxy S6:
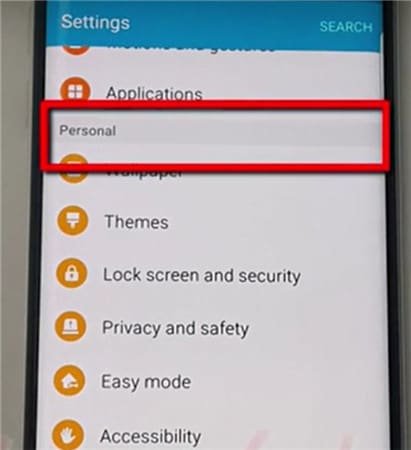
Tap on Settings, which is the gear symbol.
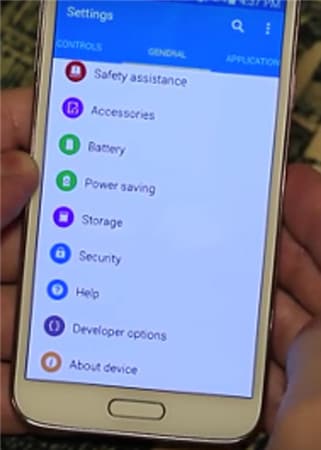
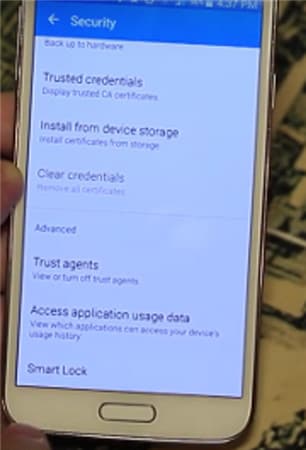
- • Click on Personal and tap on Security.
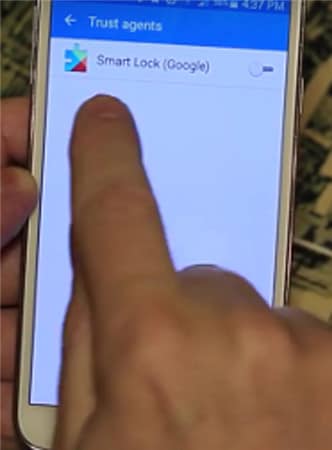
- • Go to Advanced and tap on Trust agents and make sure Smart Lock is turned on.
- • Under Screen Security tap Smart Lock.
- • Here, you need to enter your Screen Lock. If you haven’t done so, set up a password and PIN by following the on-screen prompts. The screen Lock is needed every time you have to change the Smart Lock settings.
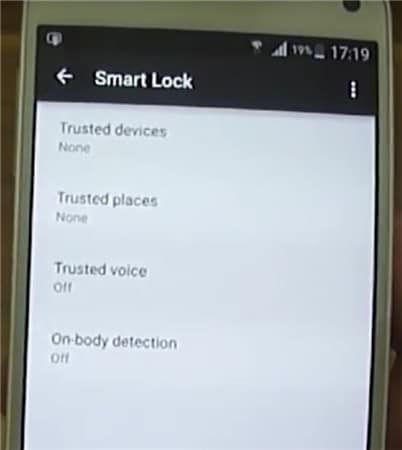
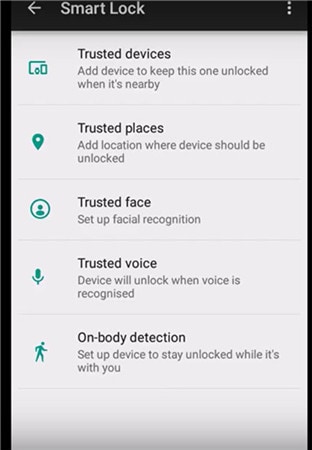
Within Smart Lock, there are three options for setting the system. You can set up trusted devices, trusted face, and trusted places individually, combining two or all three at the same time. You can choose just one trusted face, but you have the option to set up as many trusted devices and trusted places as needed.
Part 2: Turn On Smart Lock For Android with Trusted Devices
You can decide on a trusted device to be paired with Smart Lock Android.
For example, you can set up a Smart Lock for Bluetooth in your Android Bluetooth settings. It can also be done for Android NFC unlock devices. Examples include the Bluetooth system in your car, NFC unlocks, android sticker on the car’s phone dock, or Bluetooth in your watch.
- • Go to Settings.
- • Tap on Security and then Smart Lock.
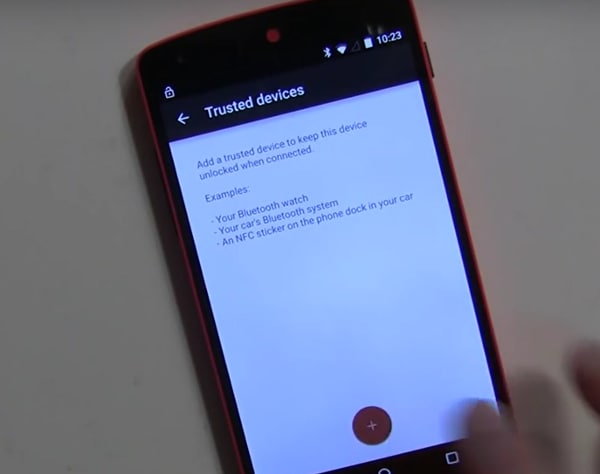
- • Existing paired options are listed under Trusted Devices.
- • Initially, trusted devices will show None.
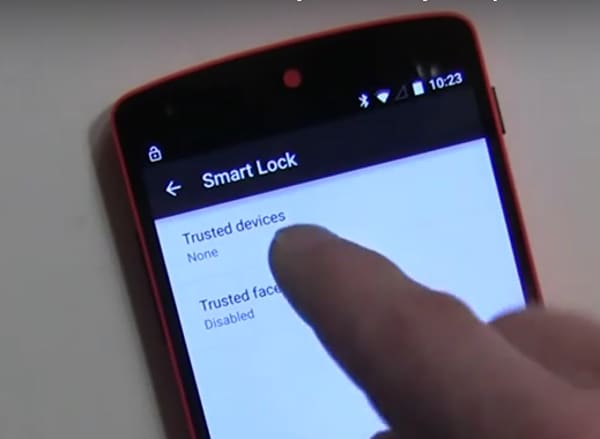
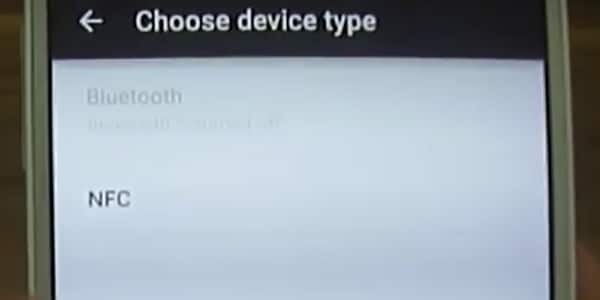
Tap on Add Trusted Devices.
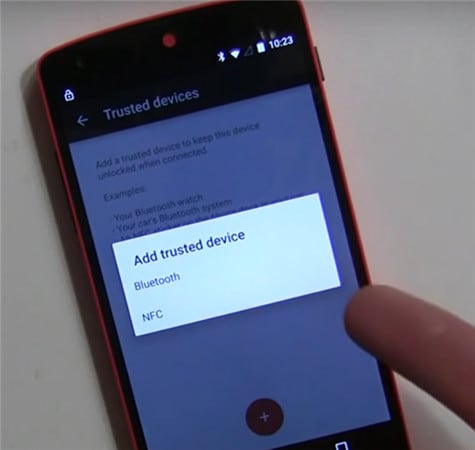
The next screen is the Choose Device Type.

Since you have already paired Bluetooth, it will ask you to choose the Vivo V30 Lite 5G device from the list.
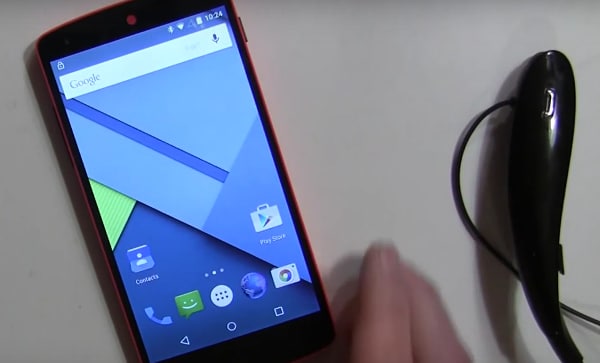
- • As an example, let’s take the case of LG HBS800. It may show Not connected until you add it.
- • It will show up under Trusted devices in the Smart Lock menu.
- • When you turn the added device on, Smart Lock now unlocks the Android mobile.
Similarly, other Bluetooth and NFC unlock android supported gadgets can be added under the list of Trusted Devices.
Part 3: Turn On Smart Lock For Android With Trusted Locations
You can also add locations or addresses to Smart Lock Trusted Locations, and the phone unlocks automatically as soon as you arrive at the desired location. For example, you can set up your home or work address under Trusted Locations.
Check current settings first.

On a new Android phone, visit Settings>Personal.
Then Lock Screen and Security.
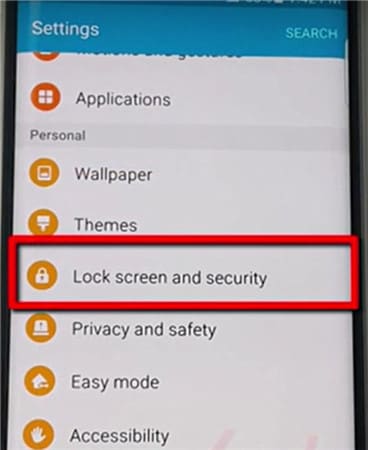
Then Secure Lock Settings.
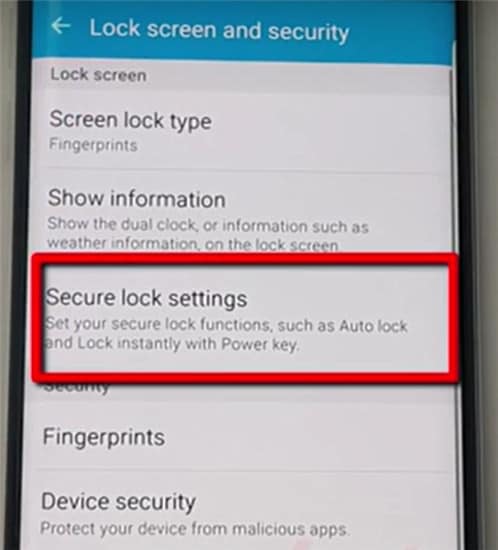
Tap Smart Lock.
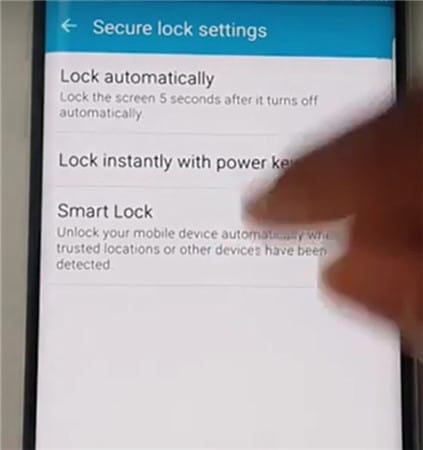
Tap on Trusted Places.
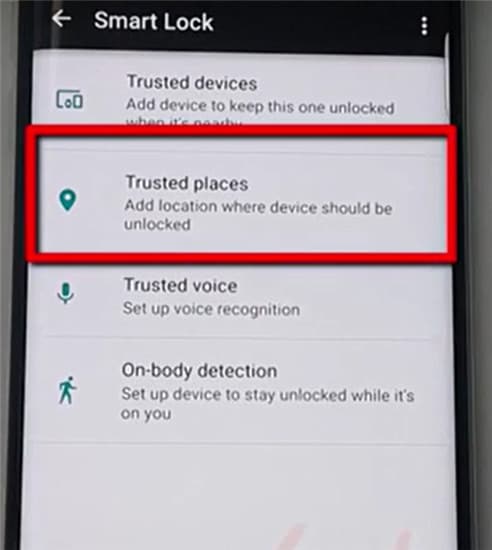
Tap on Add Trusted Places
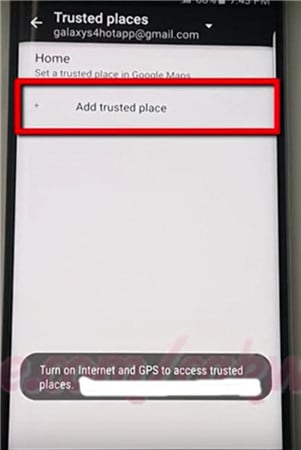
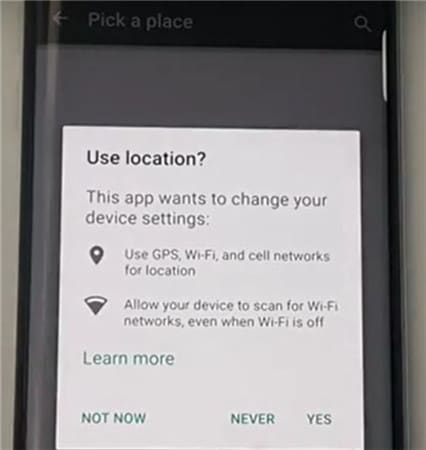
- • Initiate the Google Maps app on the Android phone. Make sure the Internet and GPS are on.
- • Pick a place.
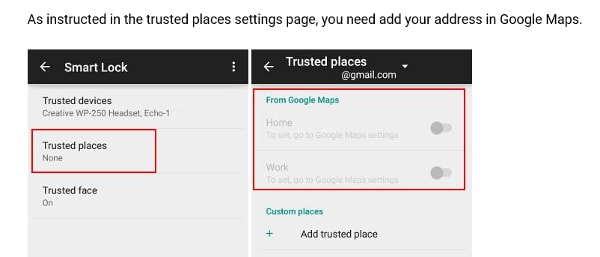
- • Click on Settings.
- • Click on Edit home or work. You can now add or edit the required addresses.
- • As an example, click on the Enter work address.
- • You now have the option to type in the address or use the address listed on Google Maps as the required work address.
- • A successful addition is listed and can be edited under the Edit work address.
- • Close the Google Maps app.
- • The work address is automatically propagated and configured with Smart Lock settings.
- • Go back to Settings> Security> Smart Lock> Trusted Places.
- • The work address you added is now listed under Work.
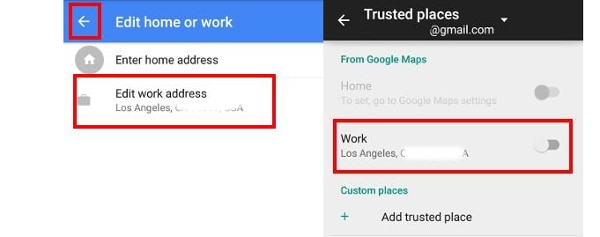
- • However, it is not yet configured as a Smart Lock option. Tap the location once, and it is enabled.
- • The switch along the address to the right turns blue, indicating it is enabled.
- • The work address is now listed under Trusted places for Work.
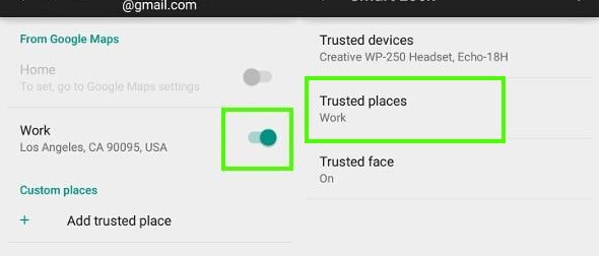
- • The phone is now configured for the work address and will unlock whenever you are at the location.
- • Since it works on Google Maps, the feature works through an Internet connection.
Part 4: Turn On Smart Lock For Android With Trusted Face
The feature recognizes your face and then unlocks the Vivo V30 Lite 5G device. Once you set up the Vivo V30 Lite 5G device to recognize your face as a trusted face, it will unlock the Vivo V30 Lite 5G device as soon as it recognizes you.
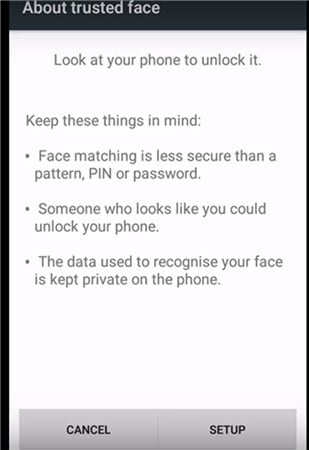
PRECAUTION: At best, this can be the first level of security, as one who resembles you to some extent can unlock the Vivo V30 Lite 5G device. Photographs are not stored in the system. The device does hold necessary data to recognize your face, and the security level is determined by how good the Vivo V30 Lite 5G device is configured. The data is not accessed by any app or loaded onto a Google server for backup.
Setting Up Trusted Face
- • Go to Smart Lock and tap Trusted Face.
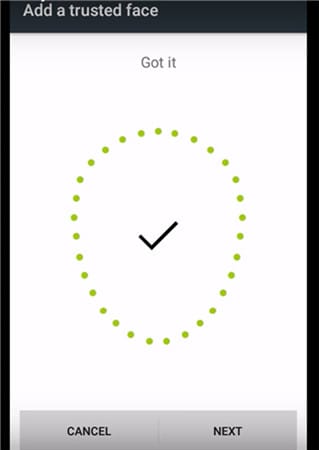
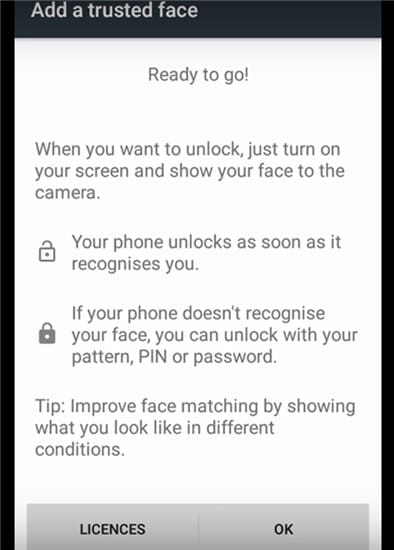
- • Tap on Setup. Follow on-screen instructions.
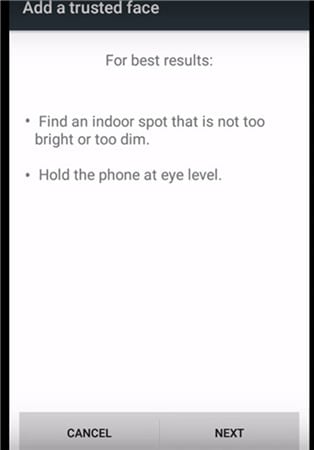
The device begins to gather data about your face. The trusted face icon appears. As a backup, in case Smart Lock does not recognize your face, use the manual system by applying the PIN or password to unlock the Vivo V30 Lite 5G device.
In case Trusted Face is not required, tap on reset Trusted Face appearing under the Trusted Face menu. Tap on Reset to reset the option.
How To Improve Facial Recognition In Your Bluetooth and Android NFC Unlock Devices
- • If you feel facial recognition is not up to the mark, go to Smart Lock and tap on a Trusted face.
- • Tap on Improve face matching.
- • Tap on Next and follow instructions on the screen to complete the task.
Smart Lock Android is a great feature and is only going to improve on time. With added security measures being introduced by Google for Bluetooth and NFC unlock android devices, including configuration to Google maps and Gmail, the feature may be one of the most important features to overcome constant blocking of devices even in protected places.
Video on How to Remove Android Lock Screen Without Data Loss
- Title: In 2024, How to Use Google Assistant on Your Lock Screen Of Vivo V30 Lite 5G Phone
- Author: Marry
- Created at : 2024-07-18 12:39:46
- Updated at : 2024-07-19 12:39:46
- Link: https://unlock-android.techidaily.com/in-2024-how-to-use-google-assistant-on-your-lock-screen-of-vivo-v30-lite-5g-phone-by-drfone-android/
- License: This work is licensed under CC BY-NC-SA 4.0.